Where's My Lunch? - January Devlog Update
/
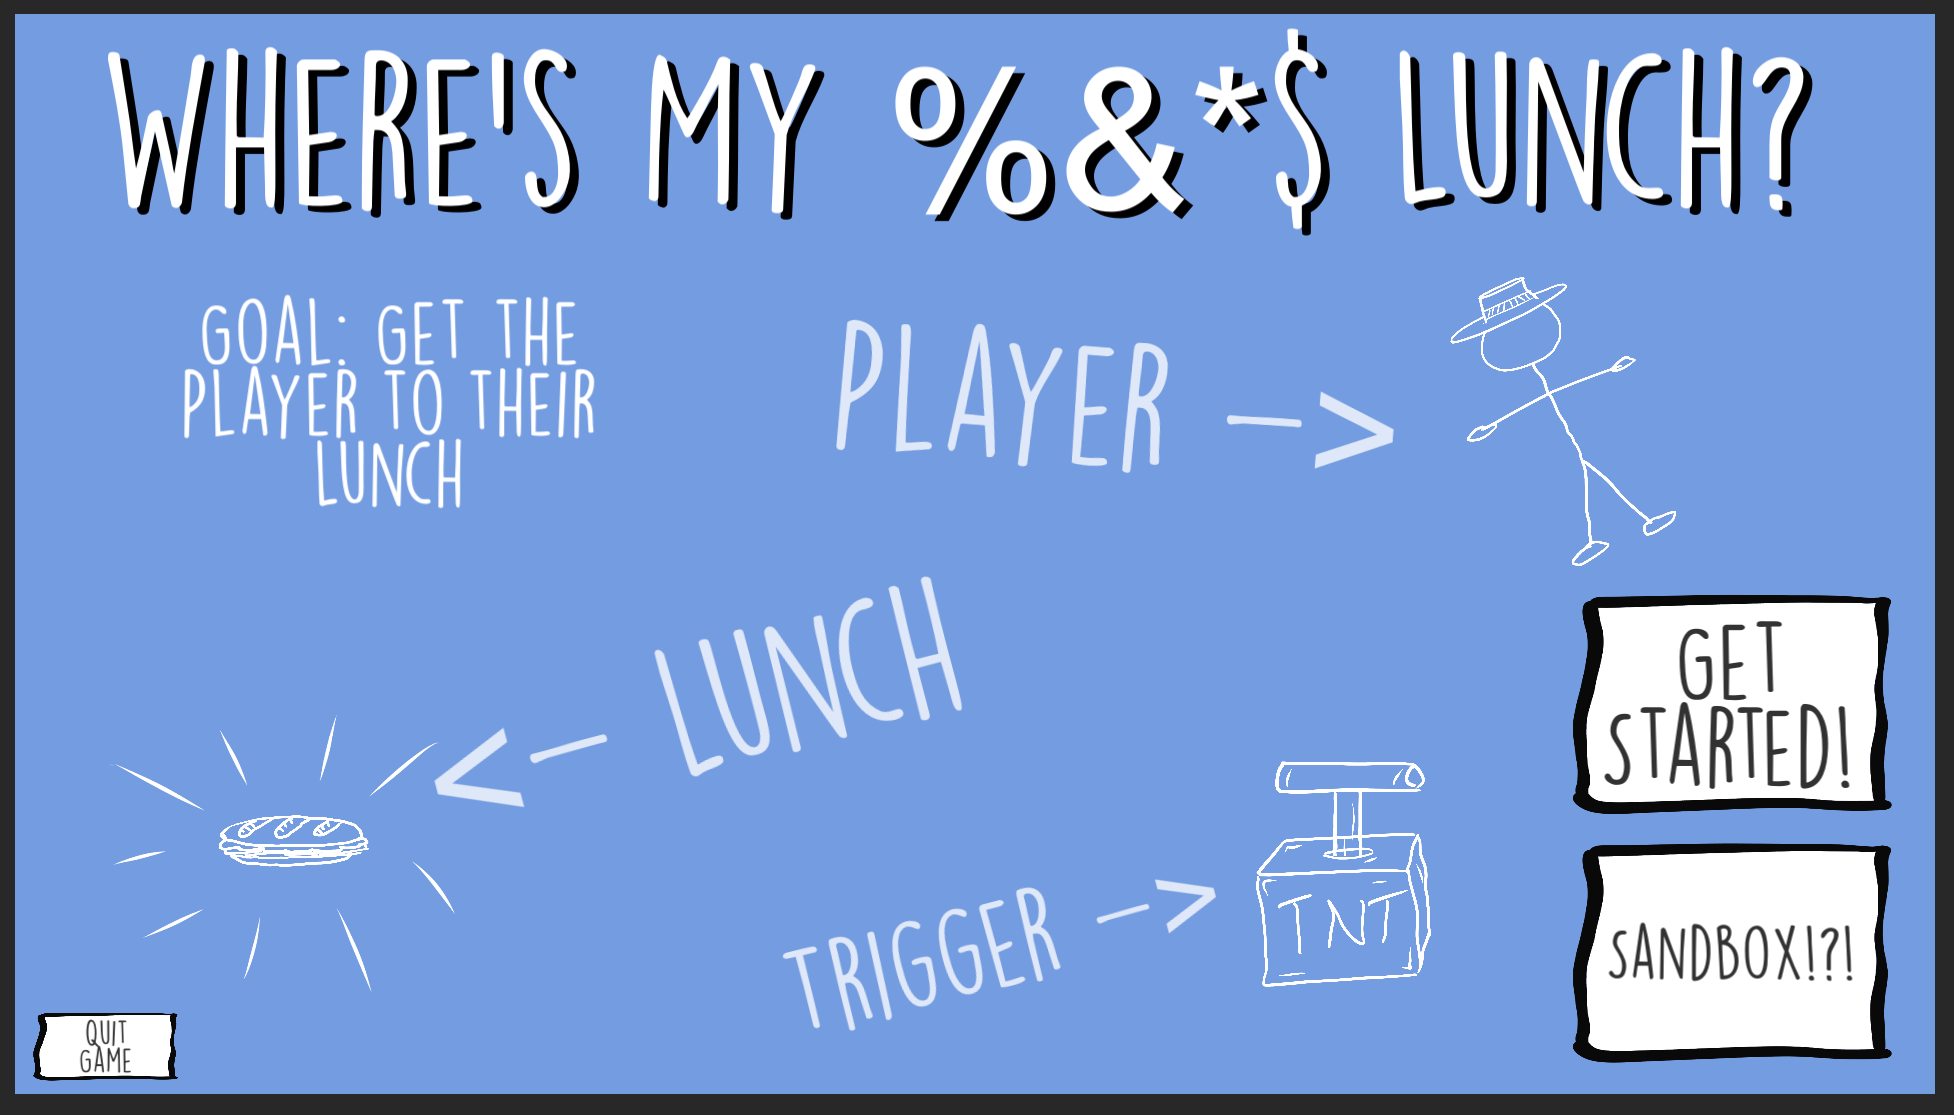
Six months ago the game “Where’s My Lunch?” was born out of the Game Makers Toolkit GameJam. The original game idea was to use bombs to move the player object around the scene to some sort of goal - trying to play on the jam’s theme of “Out of Control.” Nothing too clever, but physics and explosions are generally good fun and it seemed like a good starting point.
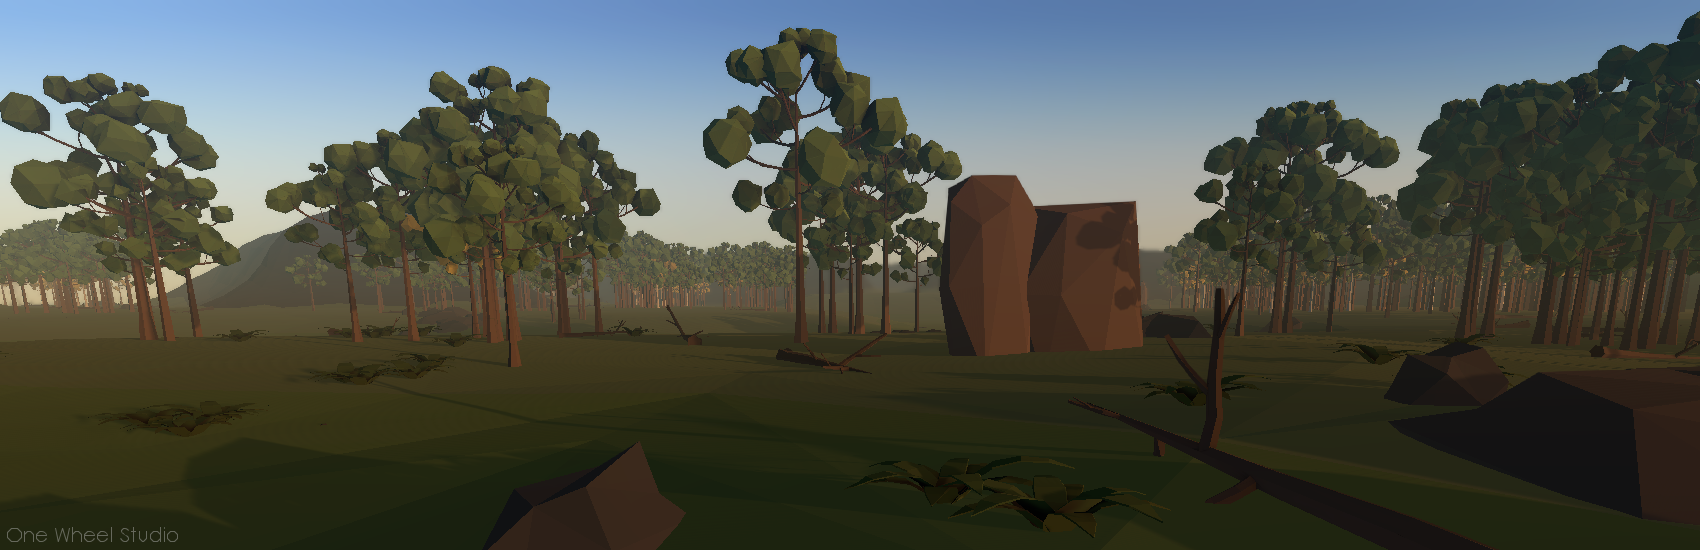
Every game or project I’d ever made in Unity was 3D and WML was no different. It started as a 3D game with the simple colored cubes and spheres standing pretending to be game art. It was clumsy and basic but still, it felt like it had some potential.
That first evening, I started to work on the art style. I needed something simple, quick, and hopefully not too hard to look at… After bumping around with a few ideas, I downloaded FireAlpaca and starting drawing stick figures. For the life of me, I can’t remember why… I just did. I tossed on a hat to add a little character and Hank was born and I was on my way to making my first ever 2D game!
Early 3d Prototype
With great input from viewers as I streamed the game’s progress, I added gravity wells and portals to the project to add even more physics-based chaos to the game. With the help of a clumsy but effective save system, I created a dozen playable levels. I was even able to add a sandbox level which was another suggestion from a viewer.

Results out of over 5000 submissions
With time running out on the 48 hour game jam, I did my best to fix a few bugs, pushed a build to Itch, and submitted my efforts to the game jam. I’d spent somewhere in the neighborhood of 20 hours working on the game and I was pretty content with the results.
The game finished in the top 10% of over 5000 games submitted, which while we always dream higher, I have to admit felt pretty darn good. With the results posted, I mentally closed up the project and didn’t intend to come back to it. I’d learned a lot and had some fun. What more was there to do with the game?
Where’s My Lunch?

I still dream of Making this game
Like so many others I’ve had projects come and go. With most not getting finished due to over scoped game ideas and lack of time to make those ideas a reality. This is a lesson I continue to struggle to learn…
A few months after the game jam, the idea came along to polish and publish a small game while making video content along the way. I loved it! It seemed like a perfect project.
I spent much of October and November planning out the project with an eye to keeping the scope small but still adding ideas and topics that might make useful videos and hopefully a more engaging game. I started work on a notion page (which I much prefer to Trello) trying to find the balance between tasks that were too big or too small. And to be honest, I’ve never forced myself to fully plan out a game to this level of detail.
The planning wasn’t particularly fun, I had to actively fight the urge to open Unity and just get to work… I didn’t list absolutely everything that needed to be done, but I got most of it and I think the result was more than worth the effort.
I knew the scope of the game. I knew what I needed to do next. And in some way, I had a contract with myself as to what I was making with clear limits on the project.
All of this had me hopeful that the project will have a different ending than so many of my past projects.
Progress?
With the planning was done it was time for the fun part. Digging into the code!
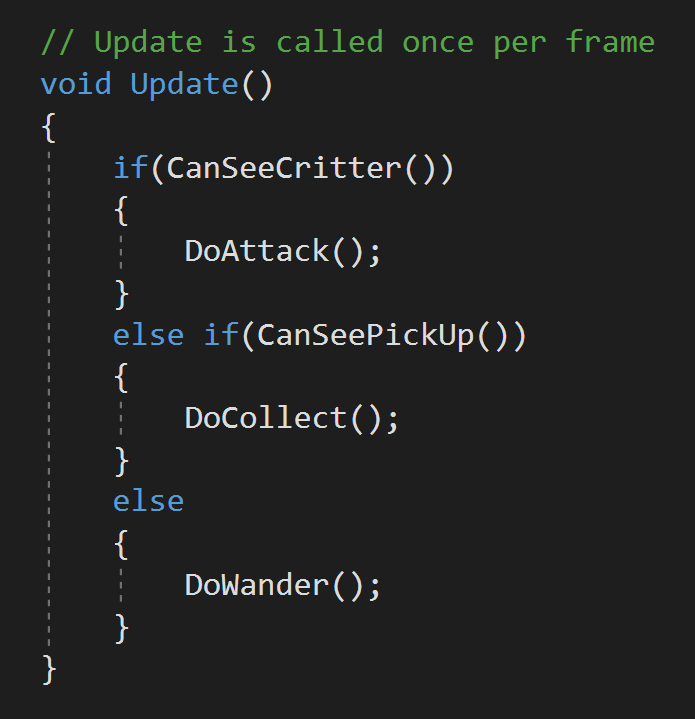
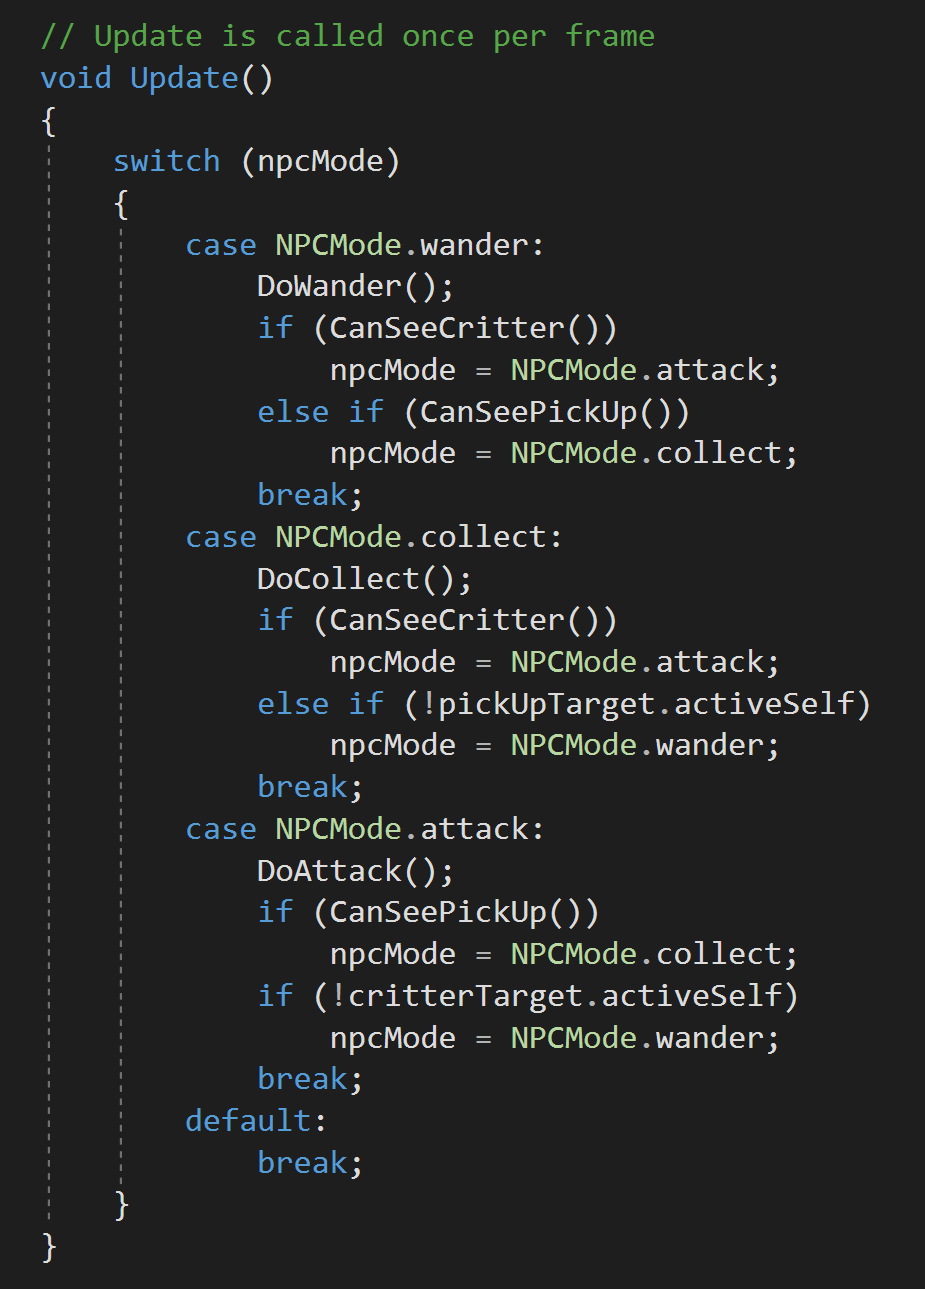
Most of the early hours spent with the code didn’t make a big difference in the appearance or even the player experience. Much of that early time was spent shoring up the underlying framework, making code more generic and more robust. I wanted to be able to add mechanics and features without breaking the game with each addition. Yes, we’ve all been there. While maybe not the highest standard, I’ve come to judge my own work by what needs to happen to add a new feature, how long that takes, and how much else breaks in the process.
Does adding a new level to the game require rewriting game manager code? Or manually adding a new UI button? Or can I simply add a game level object to a list and the game handles the rest?
What about adding the ability to change the color of an object when the player selects it? Does that break the placement system? Does that result in messy code that will need to be modified for each new game item? Or can it be done by creating a simple, clean and easy to use component that can be added to any and all selectable objects?
Holding myself to this standard and working in a small scoped game has felt really good. It hasn’t always been easy AND importantly I don’t think I could have held myself to that standard during the game jam. There simply wasn’t time.
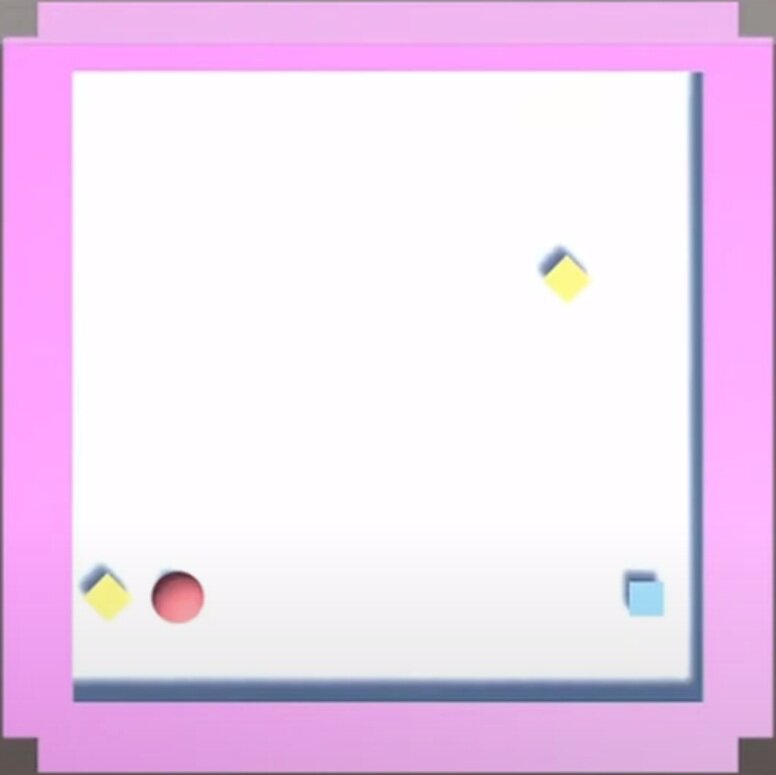
For example, during the game jam I wanted players to be able to place the portals to solve a level but in order for a portal to work it needs to have a connection to another portal… The simplest solution was to create a prefab that was a parent object with two children portals. This meant when they were added they could already be connected. And while this worked it also created all kinds of messy code to handle this structure. Which meant I had all these “if the object is a portal then do this” statements throughout the code. For me, those lines were red flags that the code wasn’t clean and it was going to need some work.
Fixing that was no small task. Every other game item was a single independent object. Plus, I knew that I wanted to have other objects that could connect like a lever and a gate or a lever and a fan and the last thing I wanted to do was add a bunch more one-off if statements to handle all those special cases.

Player made connections in Orange
My solution was to break the portals down into single unconnected objects and to allow the player to make connections by “drawing” the connection from one portal to another portal. I really like the results, especially in a hand-drawn game, but man, did it cause headaches and break a poop ton of code in the process.
Connecting portals functionally was pretty easy, drawing the lines wasn’t too hard, but updating the lines when one portal is moved or saving and then loading that hand-drawn line… Big ugh!
But! It works.
AND!
The framework doesn’t just work for portals it works for any object. Simply change the number of allowed connections in the inspector for a given prefab and it works! Adding the lever and gate objects required ZERO extra code in the connection system! The fan? Yep. No problem. Piece of cake.
Simply. Fucking. Amazing.
Vertical Slice?
To be honest, I’ve never fully understood the idea of a vertical slice of a game. Maybe that was because my games were too complex and I never got there? I don’t know, but a couple of months ago, it clicked. I understood the idea and why you would make a vertical slice.
Then I heard someone else describe it… And I was back to not being so sure.
So here’s my definition. Maybe it’s right. Maybe it’s not. I’m not sure I actually care because what I did made sense to me, it worked and I’d do it again. To me, a vertical slice means getting all the systems working. Making them general. Making them ready to handle more content. Making them robust and flexible.
For Where’s My Lunch that meant getting the save and load system working, debugging the placement system, making the UI adapt to new game elements without manual work, implementing Steamworks, adding Steam workshop functionality, and a bunch of other bits that I’ve probably forgotten about.
To me, a vertical slice means I can add mechanics and features without breaking the game and those additions are handled gracefully and as automated as possible.
Adding Content
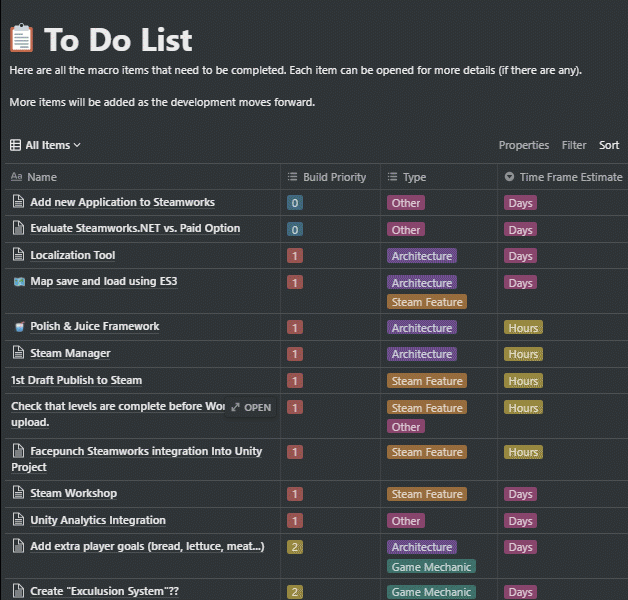
My to-Do List with game content towards the bottom
Maybe it’s surprising, but adding new mechanics is pretty low on my to-do list. As I start to reflect on this project as a whole, this may be one of the bigger things I’ve learned. About the only items lower are tasks such as finalizing the Steam Store, creating a trailer and adding trading cards. Things that rely on adding more content to the game.
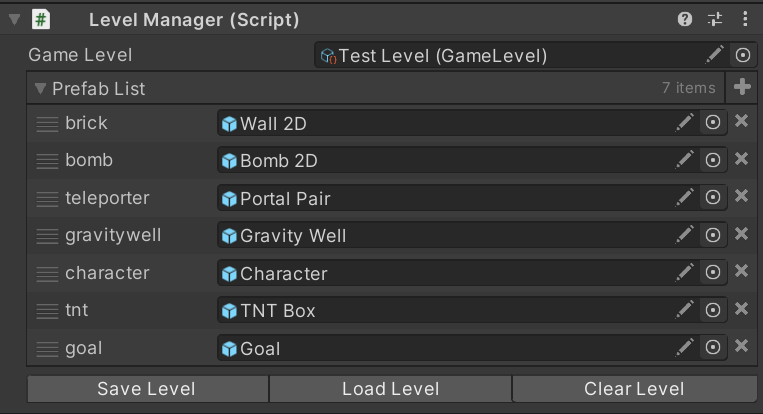
So, with the “vertical slice” looking good, I quickly added several new game items that weren’t part of the game jam version. Speed zones, levers, gates, fans, spikes, and balloons with a handful more still on the to-do list. Each game item took two or three hours including the art, building the prefab, and writing the mechanics specific code. Each item gets added to the game by simply dropping in the prefab to a list on a game manager and making sure there is a corresponding value or type of an enum that is used to identify and handle the objects by other classes.
And that is so satisfying!
100% I will revisit and tweak these new objects, but they work! And they didn’t break anything when I added them.
Simply. Fucking. Amazing.
What’s Next?
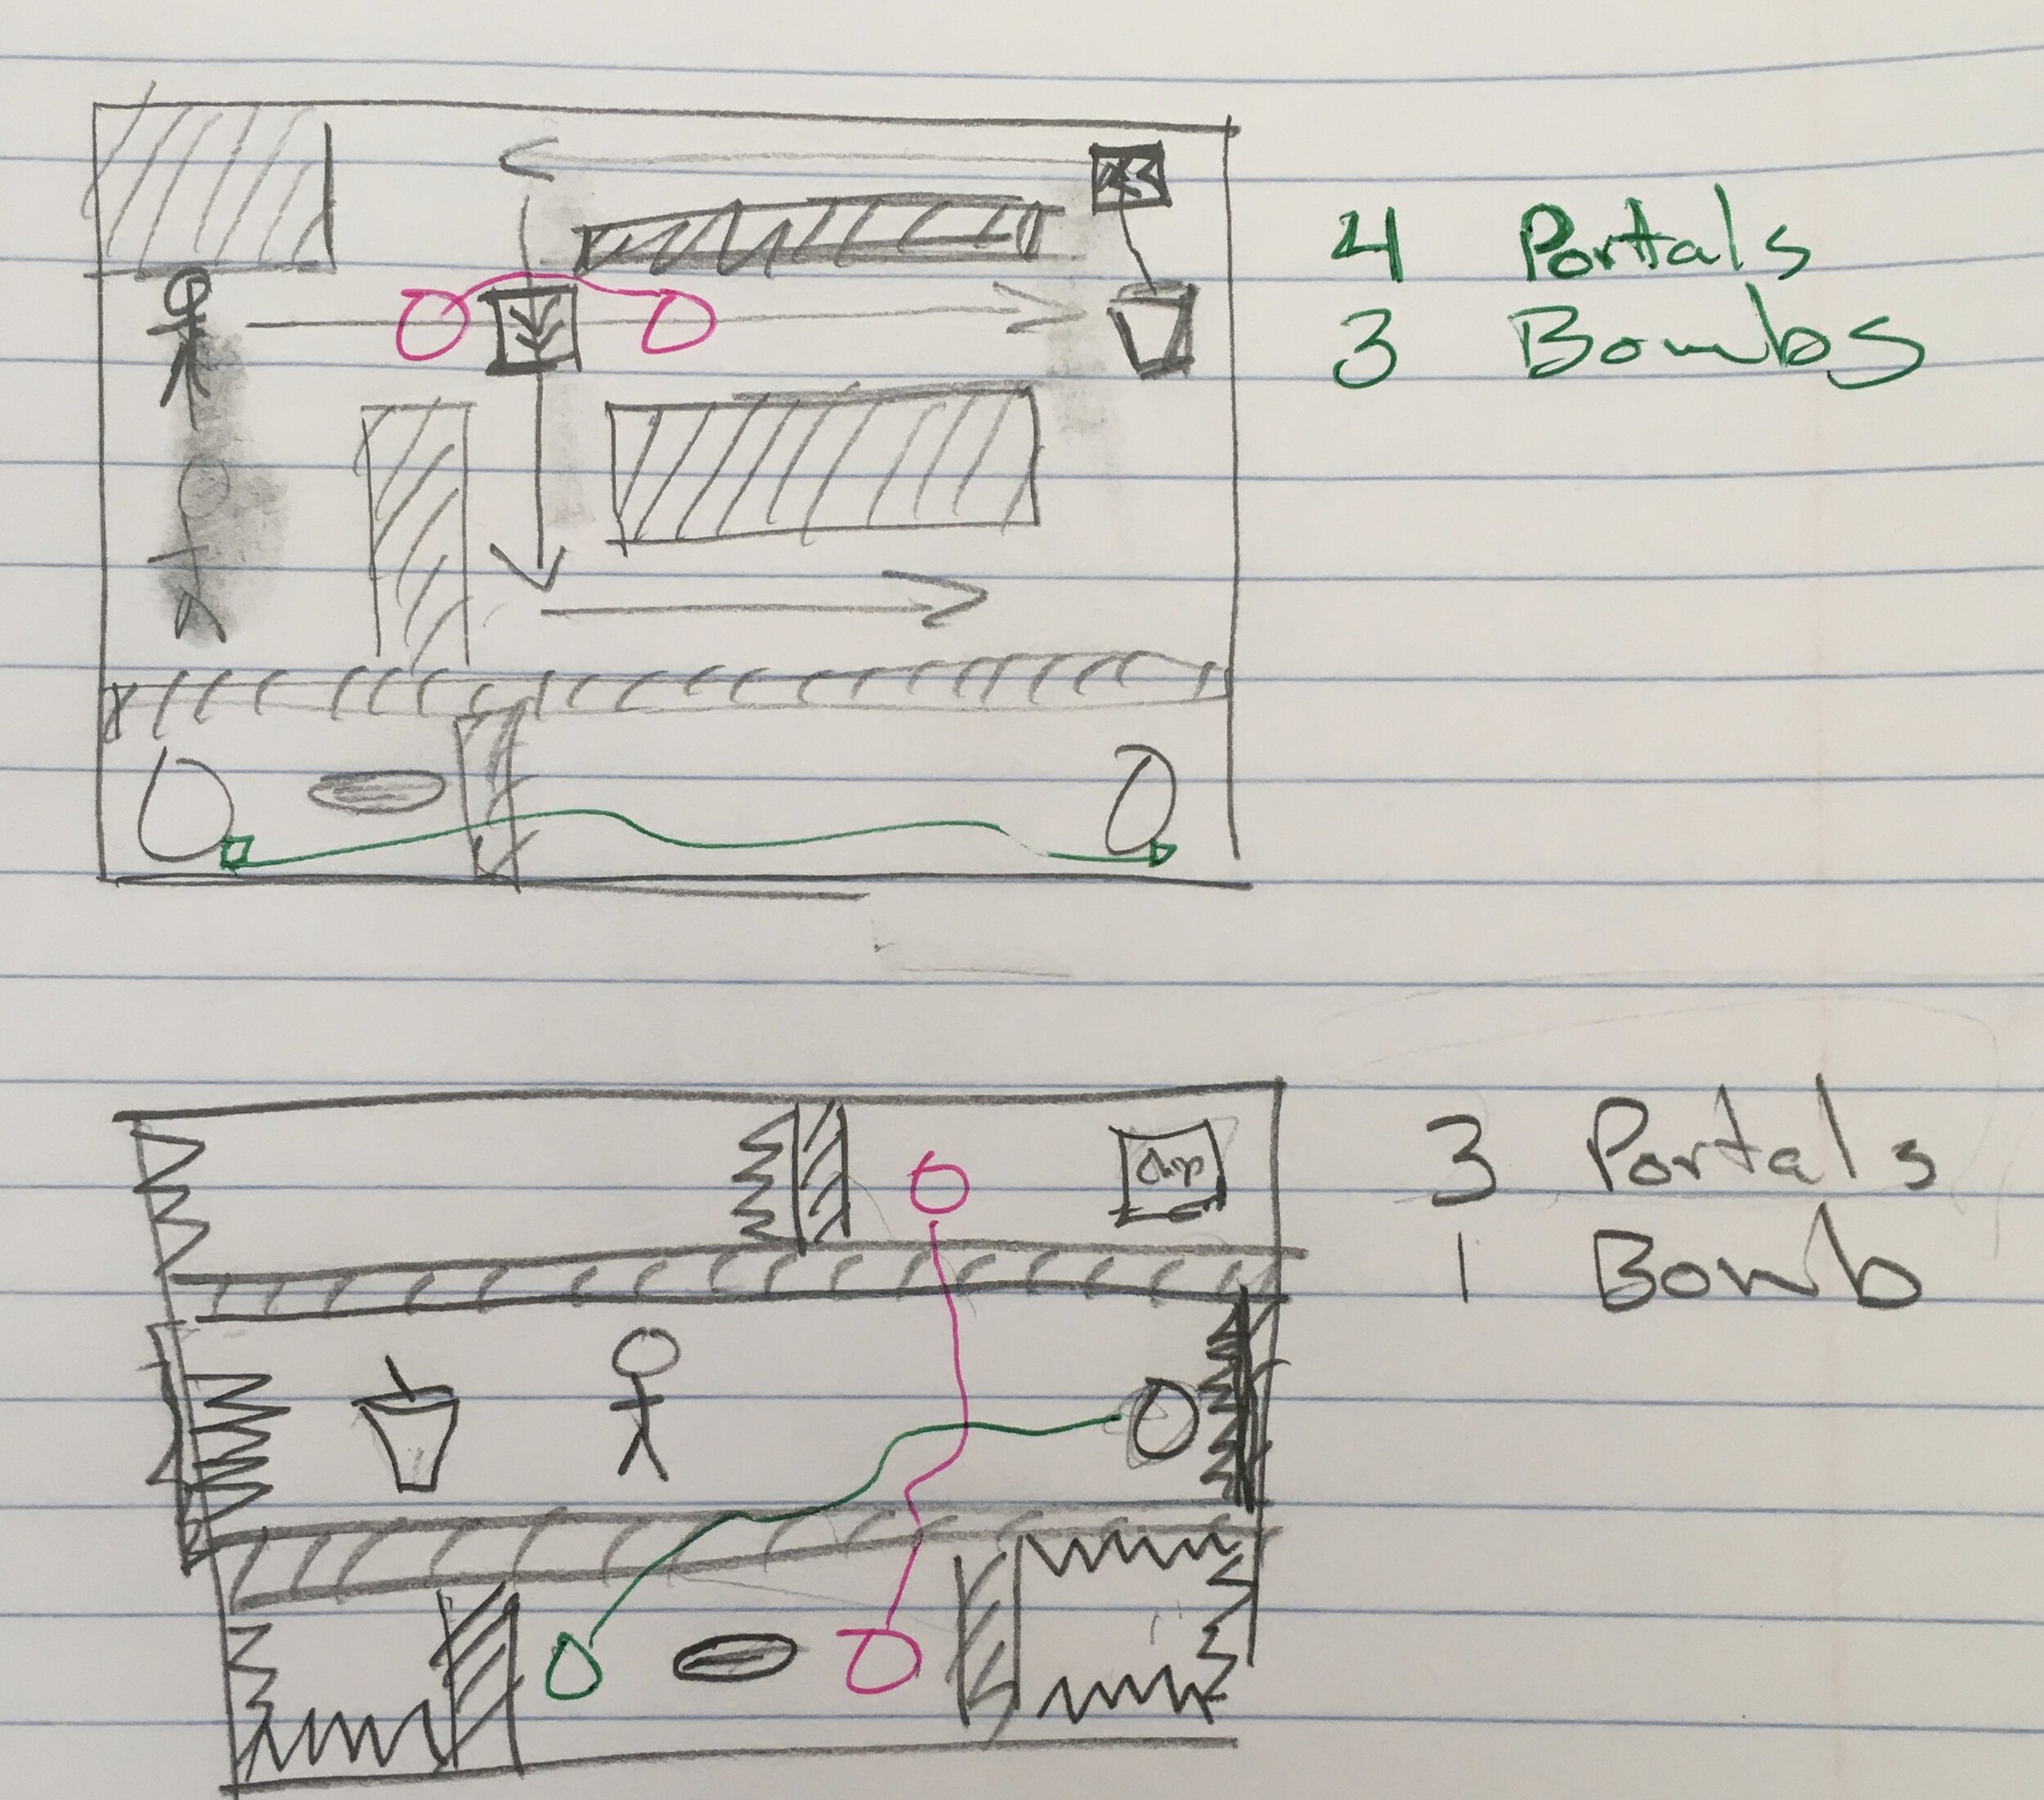
Analog Level Planning
The hardest part! Designing new levels.
The plan from here on out is to use the level designer that’s built into the game - that level that started as a sandbox playground.
To help make that process easier I’ve added box selection, copy and paste, (very) basic undo functionality, and a handful of other quality of life improvements. My hope is that players will be inspired to create and share levels and the easier those levels are to create the more levels they’ll create.
I also want to add enough levels to keep players busy for a good while. How long? I don’t know. It’s scary to think about how many levels I might need for an hour or two hours or five hours of gameplay…
While the framework is in place and gets more and more bug-free each day, there is still a lot of work to do and a lot that needs to be created.