Dev Log

Observer Pattern - C# Events
The observer pattern is one of my all time favorites. I use it ALL the time. I’ve shared it with students and they almost immediately see the usefulness of the pattern. It’s not always the easiest to wrap your head around, but it is one of the simpler programming patterns to implement in Unity.
The Big Idea
The observer pattern is all about communication between objects, sharing information and doing so in a way that decouples the object that is sharing the information from the objects that might need or make use of that information.
Score and Achievement System
Using the same example project as for the last 2 programming patterns, let’s imagine that when the NPC kills a critter the NPC’s score goes up and gets displayed on the screen. One way to do this would be to have the critter (or the NPC) call a function or change a value on the UI element. This requires the critter to have a reference to the UI element - some form of “Find Object” or assigning it in the inspector. This works and it’s how many of us did when we first started.
But, what if there is an achievement system too. That system wants to display a message for the first kill, after 5 kills and then every 10 after that? Do you link the critter to the achievement system? Does the achievement system connect to the UI element? What if you have an audio system that plays a SFX each time the score goes up?
You can probably start to see the problem.
And it gets even worse! If the UI element changes or the designer forgets to put the achievement system in the scene then errors will get thrown and the game will start to break.
The result of all of this is a mess of spaghetti code that is highly coupled or inter-connected. If any one piece is missing from a scene the game will likely break. Plus if you change how one element works that could break all the connected pieces. This is a brittle project and will not be easy to finish. And yes, we’ve all been there.
This is where the observer pattern comes in and changes how objects communicate. Instead of all the objects being connected or having references to each other. The critter can broadcast a message that it was killed. Any objects that might be interested can choose to listen for that message (or not) and then do something based on what they’ve heard. The critter no longer cares or is aware of the UI element or the achievement system. If those systems change or aren’t in the scene - nothing breaks. If new systems want to be aware of when a critter is called all they have to do is listen for a critter to broadcast a message.
This is huge! This turns the UI and the achievement system into observers of the critters!
How Does It Work?
The observer pattern is so useful that C# has essentially baked it into the language. That makes the implementation of the pattern quick, but not always super clear or intuitive. So before we get to the implementation we’re going to talk about delegates, events, actions and a tiny bit about funcs. All of these bits are related, connected and useful. If you want to skip the explanation of these bits, you can jump down to the implementation section.
Delegates
I’ve seen few things in C# that seem to confuse folks more than delegates. There’s just something odd or mysterious about them. And admittedly there is a lot going on in the syntax of a delegate. So let’s try to clear some of that up,
And to give credit where it’s due - check out the two part video series by Sebastian Lague on delegates and events. When doing my research, I couldn’t find a better explanation than these two videos. He also goes over a few more or at least different examples that I will.
Delegates can be thought of as a variable that can be assigned a function as a value. A delegate can hold a reference to a function and then the delegate can be “invoked” and the function will be called.
Now that may seem strange. Why not just call the function itself. But you can imagine a scenario where you may want to change what a particular key does when it’s pressed. One way to do that would be to invoke a delegate each time that key is pressed. Then to reassign what the key does you simply have to change the function that is subscribed to the delegate. Easy. And hugely flexible!
But for me the real benefit comes from the fact that delegates in C# are “multicast” delegates - meaning that they can have multiple functions subscribed to the delegate. So invoking one delegate can call as many functions as needed. Add to this the fact that delegates can be made public and even static and that allows classes to subscribe and unsubscribe from the delegate.
And that right there is the basis for the observer pattern!
To keep things grounded, let’s think about what this means for our example project. If our critter has a “CritterKilled” delegate that gets invoked when the critter dies, then our scorekeeping UI element and our achievement system can both subscribe to that delegate. Whenever a critter dies it invokes the delegate which in turn calls a function on the UI element and a function in the achievement system! Each class is in full control of which delegates it listens to. The UI element and the achievement system have become “observers” of the critters!
Basic Implementation

A very basic even silly implementation of Delegates
To use delegates we must first define the delegate itself. You can see this in the first line of code (after the class definition) on the right. We then need an instance of the delegate - these can be defined locally inside a function or in this case they are defined with a class wide scope. It is this instance of the delegate that will be subscribed to and invoked!
We then need to subscribe a function to the delegate. This is done with an assignment statement. Notice that we have not included the parathesis after the name of the function! We are assigning the function NOT calling the function.
It’s weird. I know.
The last step is to invoke the delegate. This line also checks if there are any subscribers (actually it’s a null check) - this is done by the question mark. If a delegate is invoked and there are no subscribers an error will get thrown - which is why we need to check before invoking.
Now to be clear. This is a simple implementation. Not necessarily how it should be done, but I want to walk through delegates step by step and not jump straight into the shortest but most abstract syntax.
More On Delegates

Examples of return values and input parameters
Delegates can have multiple input parameters and can even have a return value - or both. It’s important to note that any function that is subscribed to a delegate must have the same input parameters and return value in order to not throw an error.
The input parameters are a great way to send information to other objects. For example when a critter dies it might want to send a reference to itself so that systems know which critter died. That’s not needed in this example, but can be useful in plenty of other cases.

Subscribing and Unsusbscribing of two funtions
In general return values are not used. This comes from the fact that delegates are multicast and can call multiple functions which could mean multiple return values. However, only the return value of the last called function will be returned, which can cause all kinds of confusion as it’s not easy or even always possible to control the order that functions are subscribed.
One than one function can be added to a delegate by using the += operator with each function. This operator adds a particular function to the delegate and likewise the -= operator will remove a particular function from the delegate. In general, it’s a good practice to do this in the OnEnable and the OnDisable functions. This is particularly important when a delegate is public and functions from other class are subscribing. If a function from a class instance doesn’t unsubscribe and the class instance is destroyed an error will be thrown when the delegate is invoked.

Example of a static instance of a Delegate
Also if the assignment operator = is used all other functions will be removed from the delegate, so in general += and -= are the best practice for subscribing and unsubscribing.
As mentioned above delegates can be made public and even static. In general, I have found that public static delegates are the most useful for the observer pattern. If delegates are made public and static they are accessed (and thus subscribed) to just like any other public static property or field.
Events
Great… So what about events?

Example of a Public Static Event - with an error!
Glad you asked. Events are just delegates. The difference is that when we are creating an “event” we are actually going to create a delegate but with the keyword “event” in front of the delegate. This does is a few very important things.
With a generic public delegate the list of subscribed functions could be overwritten by any class OR that delegate could be invoked by any class. Neither of these are good things - at least in general. Using the “event” keyword prevents these two actions from happening. All that can be done publicly to an event is to add or remove a subscriber - which is much safer!
Beyond that the implementation of an event is identical to a standard delegate! Notice that when the assignment operator is used we get an error.
Actions and Funcs

Okay, so delegates are awesome. What’s the deal with actions and funcs?
Both of these are objects inherit from delegates. And in reality they are just shortcuts to create a delegate. Actions are delegates that can have input parameters, but do not have a return value. Whereas funcs are delegates that can have input parameters and have a return value - funcs handle “return values” as an out value that is always the last parameter.
So what does this do for us with the observer pattern? Not a ton, but what it does do is reduce the number of lines needed to create an event.
Notice that each event is now defined on a single line. The use of the action has already defined the delegate for us. Notice too that the second event will handle an integer input parameter. This is put in as a generic argument to the action. This input parameter is assigned or determined when the event is invoked. Using actions this way is just a short hand for what we’ve already done above.
Back to the Project

Define and Invoke the event
If you’re still with me and your brain hasn’t melted let’s apply the Observer pattern to the example project.
For our example all the action happens when the critters die and this of course could and should be expanded to other game mechanics as well. So to keep things simple and keep going with the theme of “de-coulping our code” I’ve created a new script that will invoke an event when the object it’s attached to (a critter) is disabled.
Nothing too fancy. This lack of “fanciness” is no small part of the appeal of the observer pattern.

Then we have code on the UI element that is displaying the score. Here, the code subscribes in the OnEnable function and unsubscribes in the OnDisable function. When the event is invoked the “Update Score” method is called.
Then finally we have the code that displays the achievement message. This is very similar in that we subscribe and unsubscribe to the event and call a function when the event is invoked.

The observer pattern in C# is basically built-in, but it is super useful all the same. This is one of those patterns that if you aren’t using it you really should be. If it doesn’t make sense, then keep working until it does, because it will make your projects so much easier to maintain, easier to add new features and best of all far less error prone.
And that’s really it.
Object Pooling
***New Object Pooling Post - Click Here or Check the Navigation to the Right***
If you’ve been around game design for very long you’ve likely seen a video or a post on “object pooling.” Despite the amazing performance of the modern PC a game can still start to slow down if objects are constantly being created or destroyed. By constantly, I don’t mean one object per frame. I mean 10 objects, or 100 objects per frame OR 1000 objects once every 5 seconds. Those are scenarios where object pooling can save the player from frustrating lag spikes and help an older machine squeeze out a few more FPS.
The idea of object pooling is clever, but prtettysimple. Rather than constantly creating and destroying objects the idea is to recycle or reuse objects. This is most often done by turning the object on/off or disabling it in some way. In Unity there is still some cost for turning objects on and off, but the cost is far lower than creating and destroying that object.
Before we get into the code there are lots of different “flavors” of object pooling. People have different preferences on how to keep references to objects. Personally, I like to keep a list (or queue) of objects that are not in use and that’s how I’ll be doing it here. Other ways to do this is to keep a list of all objects and search through the list for an object that can be used (often an object that is not active). While for most small game the performance difference isn’t much, but I still like the tidiness of a single collection for objects that are ready to go.

Such a Fancy game! :)
I’m also going to show two ways to create an object pool. The first will be the most usual way or at least the way that I’ve seen done in the past. The second will be more of my own take on the pattern and add more generic functionality. I can imagine there may be some performance hit to the way I’m doing it, but again the tidiness of the solution and ease of use, in my case, more than makes up for it.
For this tutorial, I’ll be using the same project as for the “State Pattern.” Check out the GIF to the right or the earlier post.
Simple Object Pooling

In the “simple” object pooling I’ll be using a queue to store references to game objects. These objects can then be retrieved from the queue when needed and returned to the queue when they are no longer needed.
If you haven’t heard of or used a “queue” it’s very much like a list in that it will contain multiple references or values. The biggest difference is a queue is a “first in first out” collection - just like a queue in real life. The first object to be “enqueued” will be the first to be “dequeued.” This makes it easy to get an object from the collection. Whereas with the more standard list we would need to get a reference to the object and then remove the object from the list. A queue does that work for us. If this is new to you make sure to check out “stacks” too which are “first in last out.”
The object pool class has three fields.
The first is the prefab that will be pooled. In my case, since I’m using the same project as for the “State Pattern” I’ll be pooling the “critter” objects.
The second is the queue that will hold references to all the gameObjects and the third is an optional parameter that will “preload” the object pool.
Preloading the pool (in the start function) may or may not be necessary and very much depends on your projects needs. If there will be a sudden and large demand for an object, think bullets in a bullet hell style game, then it might be smart to use the first frame (or several frames) of the game to create a large pool of object. This creates a lag spike at the beginning but avoids it during the game which is when the player is more likely to notice. In the case above, all I’m doing is instaniating copies of the prefab and adding them to the queue.
The object pool class also needs a function to “get” an object as well as “return” an object - both of which will be public. There can be a good argument to make these functions static as well, but I choose to keep things simple.
The “Get Critter” function will first check if there are any critters in the pool and if there are it’ll “dequeue” a critter, set it to active and then return that critter object. Instead, if the pool is empty the function will instantiate a new instance and return that object. Creating a new object is not always necessary or might not even be a good idea depending on your design constraints. In my case I’m happy to create as many critters as necessary. Another option would be to create a limit on the number that can be created - this could help control an unforeseen edge case.
The “Return Critter” function will be called by the critter itself when it has been disabled. This simply add the critter object back to the queue and then turns the object off. In some cases you may not need to or even want to not turn the object off - it just depends on the use case and the type of object. For my project turning the critter off is easy and I’m not worried about the minor performance hit of turning objects on and off.
Spawning

For object pooling to work we need a “spawner” object. To serve this purpose I’ve added a small cube with a “spawner class” on it. The class contains a value that controls how frequently an object is spawned, a values that tracks how long since the last object was spawned and a reference to the object pool.
In the start function a reference to the object pool is cached.
Then in the update fucntion the time since spawn is updated with the time of the last frame. This creates a basic timer.
Then if the time since the last spawn is greater than the spawn time - we get a new critter from the object pool. It’s important when using object pooling to be able to “initalize” the objects. In this case that means moving it to the correct position, but for more complicated objects you may need to create a dedicated initialize function. Lastly, we set the time since spawn to zero so the timer restarts - without this the spawner would create a new critter every frame!

The last piece of any object pooling system is returning the object to the pool. There are many ways to do this, but for simplicity I’ve created a new class that needs to be added to the critter. This class when disabled will return the critter to the object pool. This works, because when the NPC attacks the critter it calls a function that turns off the object.
Now this is all pretty good and not too complicated to implement.
BUT!
There is a glaring problem, at least in my eyes. When a project gets bigger and more complex their will be a need for more and more object pools.
Each. And. Every. Object will need it’s own pool. Yikes. That gets to be a mess in a hurry. And that’s where my next approach comes in.
“Advanced” Object Pooling
My personal project is a game that will be 100% okay if it runs at 30 fps or even 20 fps - it hopefully won’t but it would be okay. It also has a lot of objects that need to be created and destroyed. This includes spaceship modules and UI components. There will (hopefully) be 10’s or maybe 100’s of different ship modules. So it’s impractical to create a object pool for each type of object…

“Advanced” object Pool
It could be possible to just create one big object pool and then search through it trying to find the object that is currently needed, but I don’t like that approach either.
So my approach is to essentially create a pool of pools AND create pools dynamically at runtime when needed. How’s that sound?
The basic functionality is pretty similar to the earlier example in that we are getting and returning objects, but in this case I’ve created a dictionary that uses a string as a key and a queue of game objects as the values.
For each prefab the name of the prefab will be used as the key and a queue of those objects will be created. The object pool class is no longer specific to a given object and therefore we only need one instance per scene.
In the “Get Object” function we have an incoming prefab that is being requested - this is an important distinction to our previous verison of object pooling. We then check to see if we can find a value in the disctionary that matches the name of the requested prefab. If a value can be found we then check to see if the queue has any entries. If it doesn’t, then we create a new object and return that object. If the queue does contain a game object we “dequeue” it, set it to active and return the game object. Very much like what was done before.
There is one additional case, that of not being able to find a value in the dictionary. If this is true we also create and return a instance of the requested object.
NOTE: In the “create new object” function we are naming the new object the same as the incoming prefab. This is crucial since we are using the name as the key in the dictionary and if we don’t rename the object Unity will add a numerical suffix to the object’s name and will break our system. This is a major point of brittleness in this approach. You could also encode the key in another way such as an enum on a script.

Spawner Class
The real magic of this system comes in the return function. Here once again we check to see if we can find a matching value in the dictionary. If we can, we simply “enqueue” the object. If we can’t find a value then that means this is the first time this type of object or prefab has been added to the pool. So we need to create a new queue, enqueue the returned object and then add the queue to our dictionary along with the corresponding key.
It’s a bit more abstract, but quite a bit more useful!
Spawner
The spawner in this case is nearly identical to the previous case but with two important differences.
We’ve added a “gameObject” field that contains the prefab that will be spawned. The second important difference is that we are now calling a different function to get an object but more importantly we are also passing in the desired prefab.
Returning the Object

Just like with the earlier example we need to return the object to the pool. And this code is functionally identical to the earlier return class.
Conclusion
This second approach allows us to pool any prefab. All we need to do is give the spawning object a reference to the prefab. In my project this means I can create a “Green Critter” prefab and drop it into a different spawner object and it just works… In my opinion that’s pretty darn slick!
Cheat Codes with Unity and C#
Let’s talk cheat codes. This post, and the video that’ll get made from it, are all about the why and the how of adding cheat codes to your Unity project.
Why Add Cheat Codes?
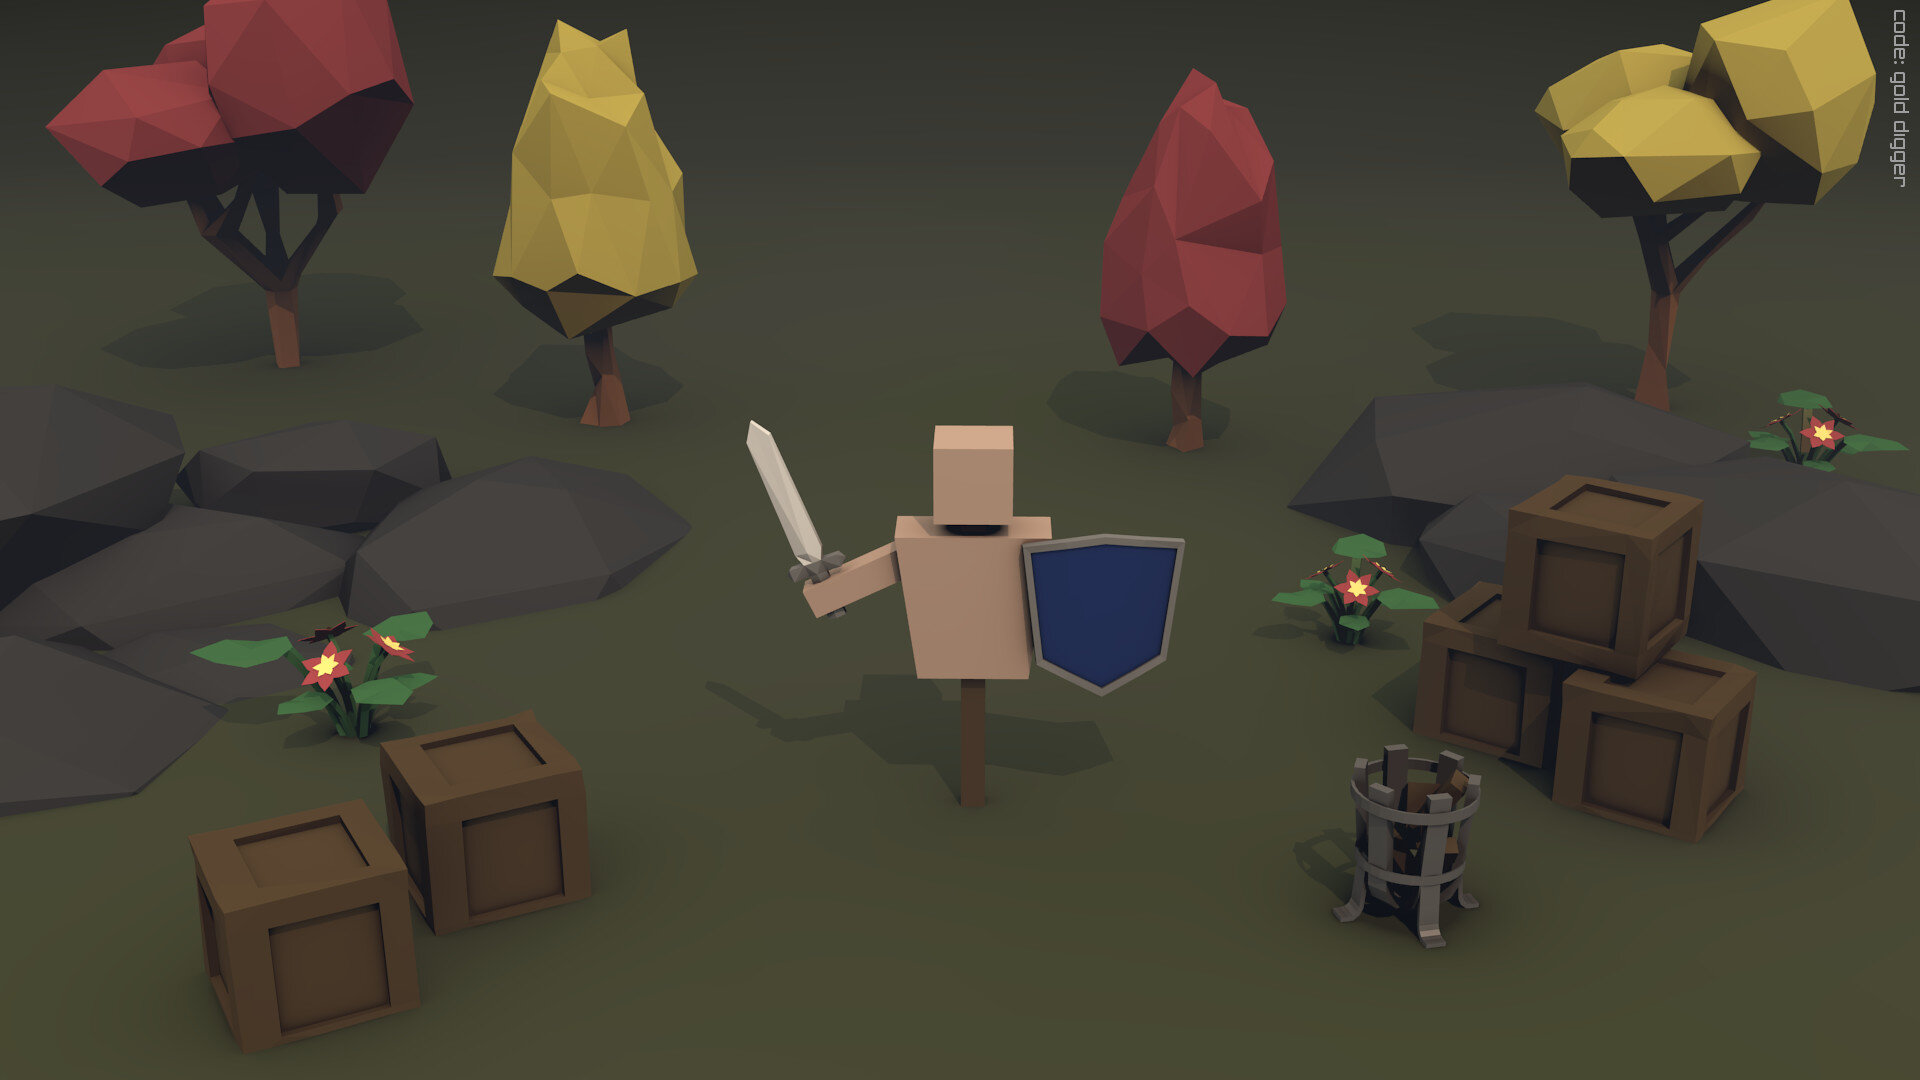
You can see the code at the top right... If you look closely.
Great question! There’s the obvious answer is that they can be fun easter eggs for your players to find and discover. In my first game I placed cheat codes in the wallpapers that players could earn by collecting cards on Steam. I’m not sure anyone found them, but I thought it was a fun idea :)
But that wasn’t the reason I first put cheats into my game. The idea was a suggestion of a twitch viewer (Wago) as a way to help with testing and debugging.
In my game, like so many others, you had to collect resources. Those resources were then used to create things like buildings or catapults. If I wanted to test that my UI was working or the placement of a building was working, I’d have to start the game, create a bunch of workers, wait for them to collect the resource and then I could test the placement of the building.
Now this didn’t take much more than 5 minutes, but when you need to do it 5, 6 or maybe 10 times in a row you end up wasting a lot of time.
And that’s where the cheat codes come in. With a few lines of additional code I could instantly have as much of any resource as I needed. A few keystrokes and the resource was available.
This changed a 5 minute testing cycle into a 30 second testing cycle. Which is HUGE! And I’m willing to bet that your project can benefit from cheat codes too.
Enough Already! How Do We Do it?

Nothing too fancy here.
Adding cheat codes is surprisingly easy. Or at least the number of lines of code is pretty reasonable - we’re talking 75ish lines. Most of the code is working with strings which was a bit foreign to me but it’s pretty straightforward.
The way I’m going to do this takes advantage of Unity events and the first thing we need to do is create a custom class that will hold the code itself and the unity event. I’ve made the class serializable so that it will show in the inspector. Also note that the class is not a Monobehavior as we won’t be adding this to a gameObject, but rather we’ll be creating a list of instances of this class.
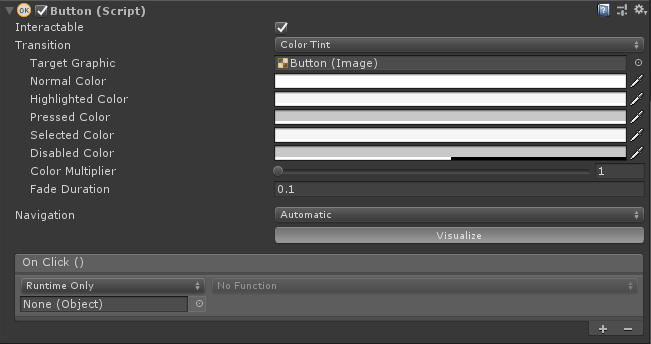
The “On click” portion contains Unity Events.
If you’re unfamiliar with Unity Events these are the same things that are in the inspector under “On Click” for a Button component where you can add an object and then call a public function when the button is pressed. They can be really handy and they can used in your own custom classes!
After the class is setup we need to create another class for the “cheat code manager” along with a few variables.
All the variables are private, but once again I’ve serialized them so that they can be seen in the inspector. This will help with debugging and in the case of the list it will help with the creation and assignment of the cheat codes themselves.
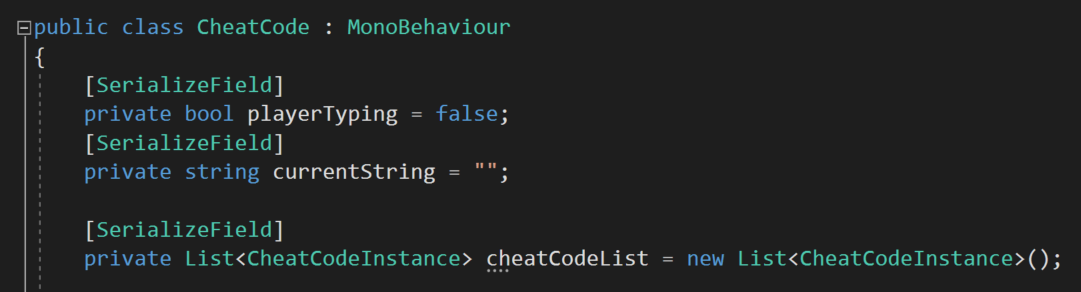
The first variable is a simple boolean which essentially tracks whether the player is typing. Which isn’t actually entirely true. Rather the value of the variable is toggled by pressing enter or return. This is how the player or developer will signal that they are entering or are finished entering a code - by pressing enter.
The string variable will simply track the characters that have been typed. This will also be used to compare against cheat codes in the list to determine if the correct code has been entered.
Lastly there’s the list - it’s a list of cheat code (instances) and the related Unity Event that will be called if that code is entered.

The backbone of the code - the Update function!
Next up is the core of the code, which is sitting in an Update function. The first step is to check if the enter or return key has been pressed. If this is done while (or after) the player was typing then that indicates that the cheat code is complete and we need to check if it’s correct. We’ll get to the “check cheat” function in just a bit. Try not to get too excited :)
After that we toggle the value of the “player typing” variable to the opposite of its current value.
The next piece is a bit of a mess of if’s and such but hopefully isn’t too tough to follow.
If the player is typing then we need to process the characters that they’ve been typing.
To do this I’m using a foreach loop that will loop through all the characters in the current input string. The value “Input.inputString” tracks all of the keys pressed in a given frame. While it’s unlikely that you can type so fast as to get multiple characters in a single frame it seems reasonable to cover all the cases.
So first we need to check if the backspace or delete (Mac, right?) keys have been pressed. If either was and the current string is longer than 0 characters we’re going to remove the last character in the string. This is done with the “substring” function. Which will essentially make a smaller string out of our “current string". We have to give the function a starting index, in this case the 0th character and and ending index, in this class the length of the string minus 1 so that we remove just the last character.
The next “if” checks whether the enter or return key was pressed. If this happened then we’ll reset the string back to an empty string.
Now you might be thinking that it might makes sense to put this further up in the update function when we were checking for the return being pressed.
But!
There is a subtle and important reason not to do that.
The enter and return keys are also recorded as characters with “Input.inputstring” and we don’t want those recorded in our current string as it will mess up the cheat code! So we need a way to filter them out - which is one of the purposes of this “else if” statement.
And lastly, the final conditional is going to add the character to the current string so we keep it updated and will be able to compare it to the cheat codes.

The last chunk of the C# code is the “check cheat” function.
This function is pretty straight forward. It takes in a string parameter, then loops through all the cheat codes in the cheat code list and checks if the input string matches the cheat code string.
If it does, the event on the cheat code instance is invoked and we return a true value.
Otherwise, if the loop finishes without finding a match a value of false is returned. The boolean return value for the function is totally optional, but could serve a purpose in some projects or applications.
Older Posts
-
January 2026
- Jan 27, 2026 Save and Load Framework Jan 27, 2026
-
April 2024
- Apr 10, 2024 Ready for Steam Next Fest? - Polishing a Steam Page Apr 10, 2024
- Apr 1, 2024 Splitting Vertices - Hard Edges for Low Poly Procedural Generation Apr 1, 2024
-
November 2023
- Nov 18, 2023 Minute 5 to Minute 10 - Completing the Game Loop Nov 18, 2023
-
September 2023
- Sep 13, 2023 Visual Debugging with Gizmos Sep 13, 2023
-
July 2023
- Jul 4, 2023 Easy Mode - Unity's New Input System Jul 4, 2023
-
May 2023
- May 19, 2023 Level Builder - From Pixels to Playable Level May 19, 2023
-
April 2023
- Apr 11, 2023 Input Action in the Inspector - New Input System Apr 11, 2023
-
February 2023
- Feb 26, 2023 Tutorial Hell - Why You're There. How to Get Out. Feb 26, 2023
-
December 2022
- Dec 31, 2022 Upgrade System (Stats Part 2) Dec 31, 2022
-
November 2022
- Nov 10, 2022 Stats in Unity - The Way I Do it Nov 10, 2022
- Nov 5, 2022 State of UI in Unity - UI Toolkit Nov 5, 2022
-
August 2022
- Aug 17, 2022 Knowing When A Coroutine Finishes Aug 17, 2022
-
April 2022
- Apr 23, 2022 Unity Input Event Handlers - Or Adding Juice the Easy Way Apr 23, 2022
-
March 2022
- Mar 15, 2022 *Quitting a Job I Love Mar 15, 2022
-
February 2022
- Feb 8, 2022 Split Screen: New Input System & Cinemachine Feb 8, 2022
-
January 2022
- Jan 24, 2022 (Better) Object Pooling Jan 24, 2022
- Jan 19, 2022 Designing a New Game - My Process Jan 19, 2022
- Jan 16, 2022 Strategy Game Camera: Unity's New Input System Jan 16, 2022
-
December 2021
- Dec 16, 2021 Raycasting - It's mighty useful Dec 16, 2021
-
November 2021
- Nov 22, 2021 Cinemachine. If you’re not. You should. Nov 22, 2021
-
August 2021
- Aug 3, 2021 C# Extension Methods Aug 3, 2021
-
June 2021
- Jun 27, 2021 Changing Action Maps with Unity's "New" Input System Jun 27, 2021
-
May 2021
- May 28, 2021 Unity's New Input System May 28, 2021
- May 8, 2021 Bolt vs. C# - Thoughts with a dash of rant May 8, 2021
-
March 2021
- Mar 10, 2021 Coroutines - Unity & C# Mar 10, 2021
-
January 2021
- Jan 14, 2021 Where's My Lunch? - January Devlog Update Jan 14, 2021
-
December 2020
- Dec 27, 2020 C# Generics and Unity Dec 27, 2020
- Dec 7, 2020 Steam Workshop with Unity and Facepunch Steamworks Dec 7, 2020
-
November 2020
- Nov 27, 2020 Simple Level Save and Load System (Unity Editor) Nov 27, 2020
- Nov 9, 2020 Command Pattern - Encapsulation, Undo and Redo Nov 9, 2020
-
October 2020
- Oct 28, 2020 GJTS - Adding Steamworks API and Uploading Oct 28, 2020
- Oct 9, 2020 Game Jam... Now What? Oct 9, 2020
-
August 2020
- Aug 16, 2020 Strategy Pattern - Composition over Inheritance Aug 16, 2020
-
July 2020
- Jul 24, 2020 Observer Pattern - C# Events Jul 24, 2020
- Jul 15, 2020 Object Pooling Jul 15, 2020
- Jul 3, 2020 Cheat Codes with Unity and C# Jul 3, 2020
-
June 2020
- Jun 16, 2020 The State Pattern Jun 16, 2020
-
August 2019
- Aug 12, 2019 Easy UI Styles for Unity Aug 12, 2019
-
July 2019
- Jul 3, 2019 9th Grade Math to the Rescue Jul 3, 2019
-
June 2019
- Jun 12, 2019 Introducing My Next Game (Video DevLog) Jun 12, 2019
-
May 2019
- May 29, 2019 Programming Challenges May 29, 2019
-
March 2019
- Mar 2, 2019 Something New - Asking "What Can I Learn?" Mar 2, 2019
-
November 2018
- Nov 30, 2018 A Growing Channel and a New Tutorial Series Nov 30, 2018
-
October 2018
- Oct 11, 2018 Procedural Spaceship Generator Oct 11, 2018
-
July 2018
- Jul 11, 2018 Implementing SFX in Unity Jul 11, 2018
-
May 2018
- May 31, 2018 Prototyping Something New May 31, 2018
-
April 2018
- Apr 17, 2018 When to Shelve a Game Project? Apr 17, 2018
-
February 2018
- Feb 9, 2018 State of the Game - Episode 3 Feb 9, 2018
-
December 2017
- Dec 16, 2017 State of the Game - Episode 2 Dec 16, 2017
-
November 2017
- Nov 7, 2017 The Bump From A "Viral" Post Nov 7, 2017
-
October 2017
- Oct 30, 2017 NPC Job System Oct 30, 2017
-
September 2017
- Sep 1, 2017 Resources and Resource Systems Sep 1, 2017
-
August 2017
- Aug 3, 2017 State of the Game - Episode 1 Aug 3, 2017
-
June 2017
- Jun 20, 2017 Resources: Processing, Consumption and Inventory Jun 20, 2017
- Jun 15, 2017 Energy is Everything Jun 15, 2017
-
May 2017
- May 16, 2017 Graphing Script - It's not exciting, but it needed to be made May 16, 2017
- May 2, 2017 Tutorials: Low Poly Snow Shader May 2, 2017
-
April 2017
- Apr 28, 2017 Low Poly Snow Shader Apr 28, 2017
- Apr 21, 2017 Environmental Simulation Part 2 Apr 21, 2017
- Apr 11, 2017 Environmental Simulation Part 1 Apr 11, 2017
-
March 2017
- Mar 24, 2017 Building a Farming Game Loop and Troubles with Ground Water Mar 24, 2017
-
February 2017
- Feb 25, 2017 The Inevitable : FTF PostMortem Feb 25, 2017
-
December 2016
- Dec 7, 2016 Leaving Early Access Dec 7, 2016
-
November 2016
- Nov 28, 2016 Low Poly Renders Nov 28, 2016
- Nov 1, 2016 FTF: Testing New Features Nov 1, 2016
-
October 2016
- Oct 27, 2016 Watchtowers - Predictive Targeting Oct 27, 2016
- Oct 21, 2016 Click to Color Oct 21, 2016
- Oct 19, 2016 Unity Object Swapper Oct 19, 2016
-
September 2016
- Sep 18, 2016 Testing Single Player Combat Sep 18, 2016
-
May 2016
- May 25, 2016 Release Date and First Video Review May 25, 2016
-
March 2016
- Mar 26, 2016 Getting Greenlit on Steam Mar 26, 2016