Cinemachine. If you’re not. You should.
So full disclosure! This isn’t intended to be the easy one-off tutorial showing you how to make a particular thing. I want to get there, but this isn’t it. Instead, this is an intro. An overview.
If you’re looking for “How do I make an MMO RPG RTS 2nd Person Camera” this isn’t the tutorial for you. But! I learned a ton while researching Cinemachine (i.e. reading the documentation and experimenting) and I figured if I learned a ton then it might be worth sharing. Maybe I’m right. Maybe I’m not.
Cinemachine. What is it? What does it do?
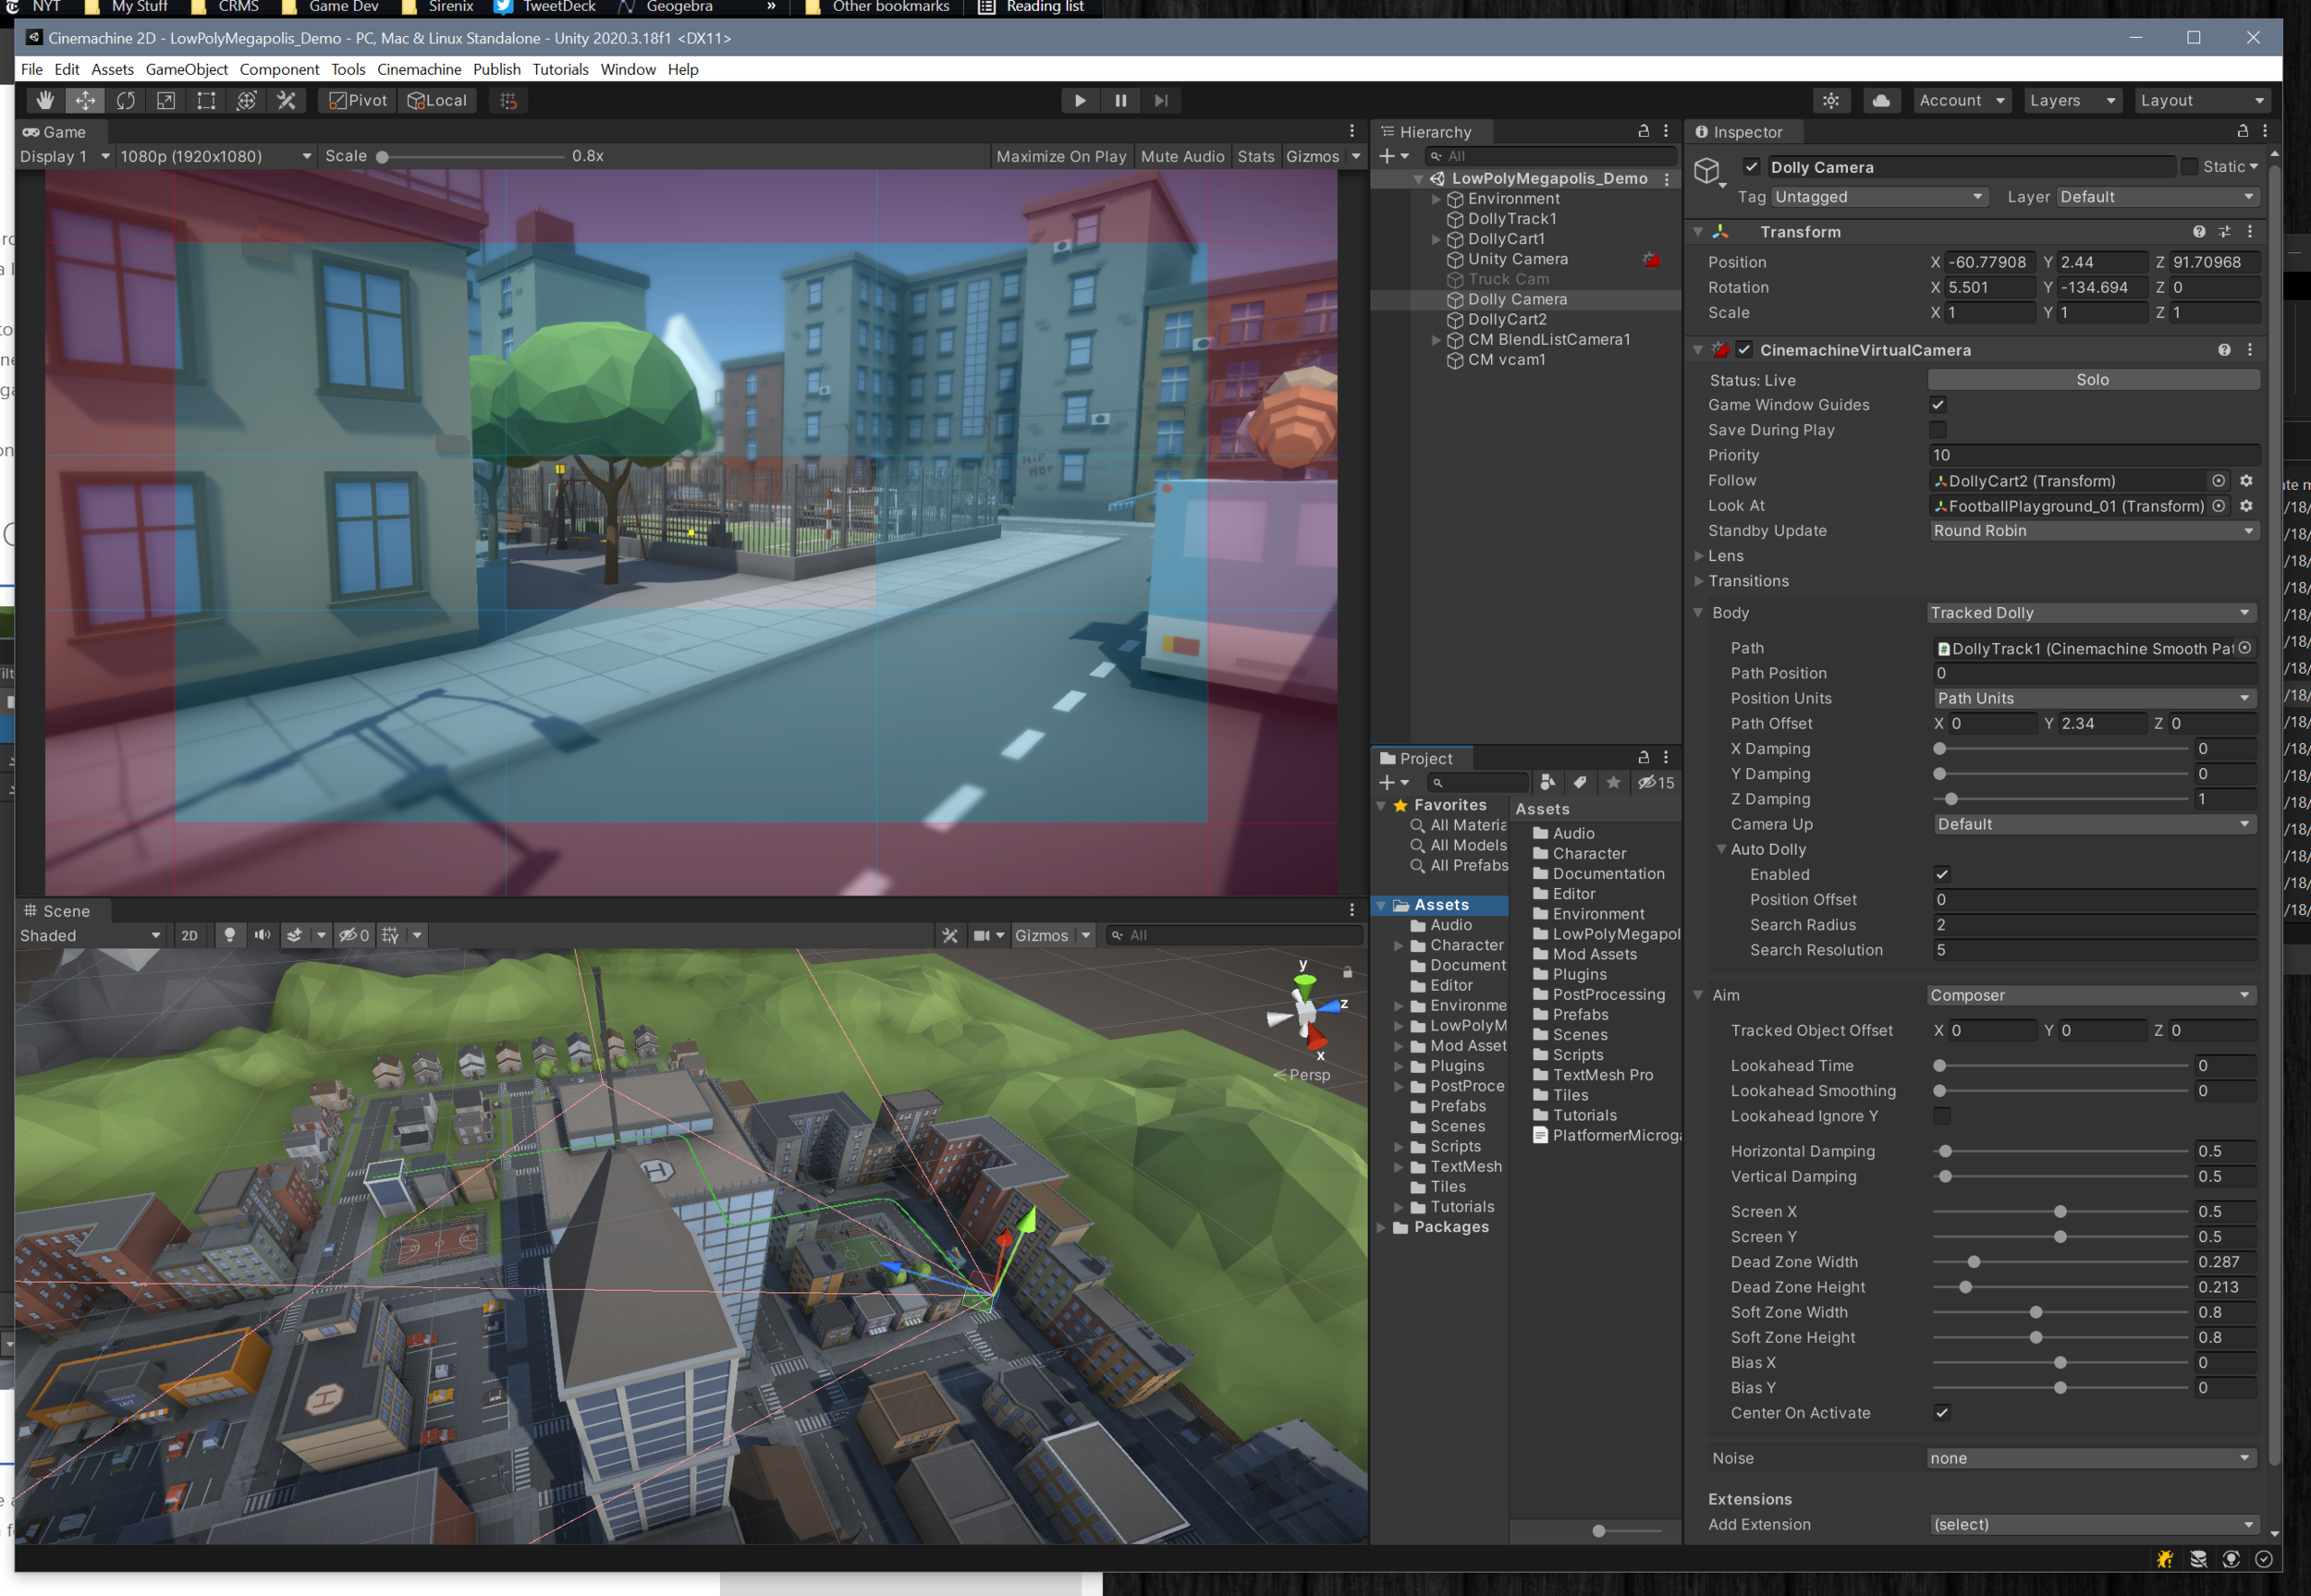
Cinemachine setup in the a Unity scene
Cinemachine is a Unity asset that quickly and easily creates high-functioning camera controllers without the need (but with the option) to write custom code. In just a matter of minutes, you can add Cinemachine to your project, drop in the needed prefabs and components and you’ll have a functioning 2D or 3D camera!
It really is that simple.
But!
If you’re like me you may have just fumbled your way through using Cinemachine and never really dug into what it can do, how it works, or the real capabilities of the asset. This leaves a lot of potential functionality undiscovered and unused.
Like I said above, this tutorial is going to be a bit different, many other tutorials cover the flashy bits or just a particular camera type, this post will attempt to be a brief overview of all the features that Cinemachine has to offer. Future posts will take a look at more specific use cases such as cameras for a 2D platformer, 3rd person games, or functionality useful for cutscenes and trailers.
If there’s a particular camera type, game type, or functionality you’d like to see leave a comment down below.
How do you get Cinemachine?

Cinemachine in the PAckage Manager
Cinemachine used to be a paid asset on the asset store and as I remember it, it was one of the first assets that Unity purchased and made free for all of its users! Nowadays it takes just a few clicks and a bit of patience with the Unity package manager to add Cinemachine to your project. Piece of cake.
The Setup
Once you’ve added Cinemachine to your project the next step is to add a Cinemachine Brain to your Unity Camera. The brain must be on the same object as the Unity camera component since it functions as the communication link between the Unity camera and any of the Cinemachine Virtual Cameras that are in the scene. The brain also controls the cut or blend from one virtual camera to another - pretty handy when creating a cut scene or recording footage for a trailer. Additionally, the brain is also able to fire events when the shot changes like when a virtual camera goes live - once again particularly useful for trailers and cutscenes.

Cinemachine Brain
Cinemachine does not add more camera components to your scene, but instead makes use of so-called “virtual cameras.” These virtual cameras control the position and rotation of the Unity camera - you can think of a virtual camera as a camera controller, not an actual camera component. There are several types of Cinemachine Virtual Cameras each with a different purpose and different use. It is also possible to program your own Virtual Camera or extend one of the existing virtual cameras. For most of us, the stock cameras should be just fine and do everything we need with just a bit of tweaking and fine-tuning.
Cinemachine offers several prefabs or presets for virtual camera objects - you can find them all in the Cinemachine menu. Or if you prefer you can always build your own by adding components to gameObjects - the same way everything else in Unity gets put together.
As I did my research, I was surprised at the breadth of functionality, so at the risk of being boring, let’s quickly walk through the functionality of each Cinemachine prefab.
Virtual Cameras

Bare Bones Basic Virtual Camera inspector
The Virtual Camera is the barebones base virtual camera component slapped onto a gameObject with no significant default values. Other virtual cameras use this component (or extend it) but with different presets or default values to create specific functionality.
The Freelook Camera provides an out-of-the-box and ready-to-go 3rd person camera. Its most notable feature is the rigs that allow you to control and adjust where the camera is allowed to go relative to the player character or more specifically the Look At target. If you’re itching to build a 3rd person controller - check out my earlier video using the new input system and Cinemachine.
The 2D Camera is pretty much what it sounds like and is the virtual camera to use for typical 2D games. Settings like softzone, deadzone and look ahead time are really easy to dial in and get a good feeling camera super quick. This is a camera I intend to look at more in-depth in a future tutorial.
The Dolly Camera will follow along on a track that can be easily created in the scene view. You can also add a Cart component to an object and just like the dolly camera, the cart will follow a track. These can be useful to create moving objects (cart) or move a (dolly) camera through a scene on a set path. Great for cutscenes or footage for a trailer.
“Composite” Cameras
The word “composite” is my word. The prefabs below use a controlling script for multiple children cameras and don’t function the same as a single virtual camera. Instead, they’re a composite of different objects and multiple different virtual cameras.
Some of these composite cameras are easier to set up than others. I found the Blend List camera 100% easy and intuitive. Whereas the Clear Shot camera? I got it working but only by tinkering with settings that I didn’t think I’d need to adjust. The 10 minutes spent tinkering is still orders of magnitude quicker than trying to create my own system!!
The Blend List Camera allows you to create a list of cameras and blend from one camera to another after a set amount of time. This would be super powerful for recording footage for a trailer.
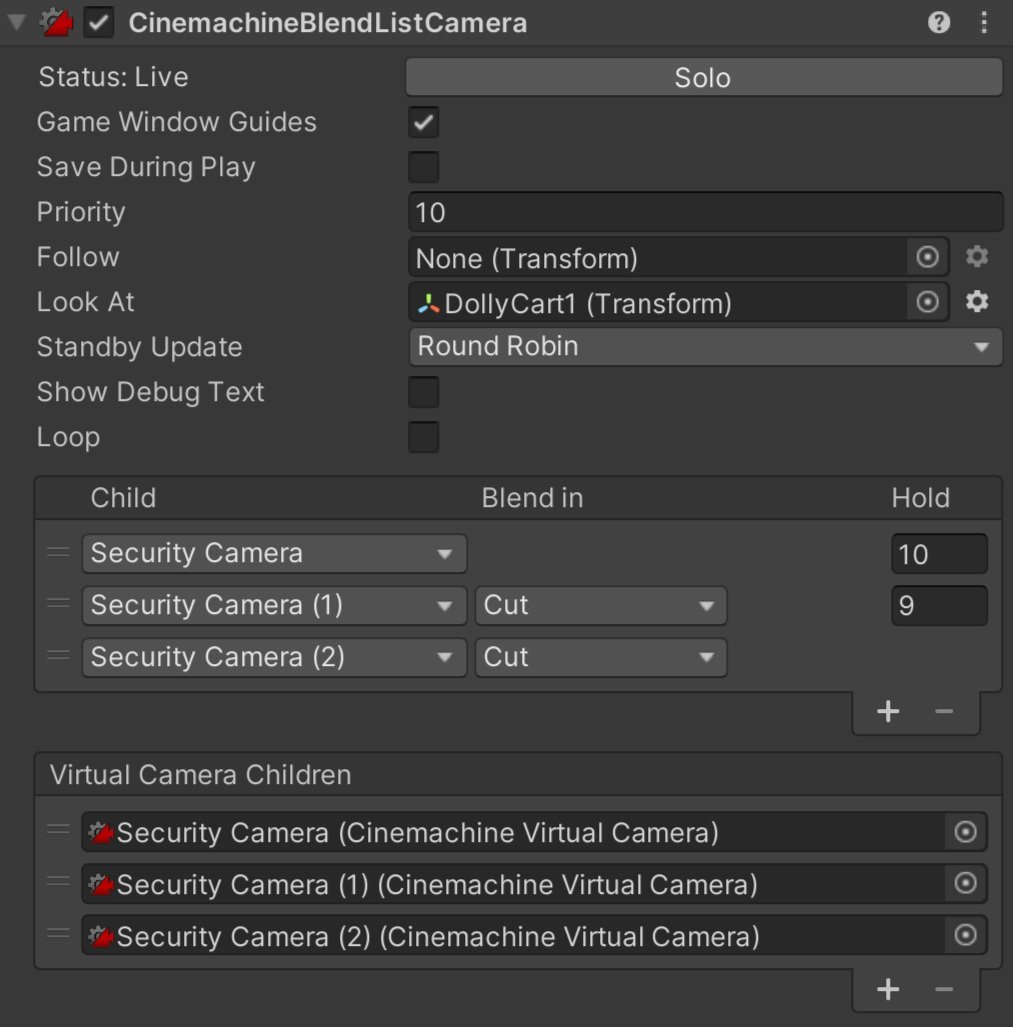
Blend List Camera
The State-Driven Camera is designed to blend between cameras based on the state of an animator. So when an animator transitions, from say running to idle, you might switch to a different virtual camera that has different settings for damping or a different look-ahead time. Talk about adding some polish!
The ClearShot Camera can be used to set up multiple cameras and then have Cinemachine choose the camera that has the best shot of the target. This could be useful in complex scenes with moving objects to ensure that the target is always seen or at least is seen the best that it can be seen. This has similar functionality to the Blend List Camera, but doesn’t need to have timings hard coded.
The Target Group Camera component can act as a “Look At” target for a virtual camera. This component ensures that a list of transforms (assigned on the Target Group Camera component) stays in view by moving the camera accordingly.

Out of the Box settings with Group Target - Doing its best to keep the 3 cars in the viewport
The Mixing Camera is used to set the position and rotation of a Unity camera based on the weights of its children's cameras. This can be used in combination with animating the weights of the virtual cameras to move the Unity camera through a scene. I think of this as creating a bunch of waypoints and then lerping from one waypoint to the next. Other properties besides position and rotation are mixed.
Ok. That’s a lot. Take a break. Get a drink of water, because that’s the prefabs, and there’s still a lot more to come!
Shared Camera Settings
There are a few settings that are shared between all or most of the virtual cameras and the cameras that don’t share very many settings fall into the “Composite Camera” category and have children cameras that DO share the settings. So let’s dive into those settings to get a better idea of what they all do and most importantly what we can then do with the Cinemachine.

All the common and shared virtual camera settings
The Status line, I find a bit odd, it shows whether the camera is Live, in Standby, or Disabled which is straightforward enough, but the “Solo” button next to the status feels like an odd fit. Clicking this button will immediately give visual feedback from that particular camera, i.e. treating this camera as if it is the only or solo camera in the scene? If you are working on a complex cutscene with multiple cameras I can see this feature being very useful.
The Follow Target is the transform for the object that the virtual camera will move with or will attempt to follow based on the algorithm chosen. This is not required for the “composite” cameras but all the virtual cameras will need a follow target.
The Look At Target is the transform for the object that the virtual camera will aim at or will try to keep in view. Often this is the same as the Follow Target, but not always.
The Standby Update determines the interval that the virtual camera will be updated. Always, will update the virtual camera every frame whether the camera is live or not. Never, will only update the camera when it is live. Round Robin, is the default setting and will update the camera occasionally depending on how many other virtual cameras are in the scene.
The Lens gives access to the lens settings on the Unity camera. This can allow you to change those settings per virtual camera. This includes a Dutch setting that rotates the camera on the z-axis.
The Transitions settings allow customization of the blending or transition from one virtual came to or from this camera.
Body
The Body controls how the camera moves and is where we really get to start customizing the behavior of the camera. The first slot on the body sets the algorithm that will be used to move the camera. The algorithm chosen will dictate what further settings are available.
It’s worth noting that each algorithm selected in the Body works alongside the algorithm selected in the Aim (coming up next). Since these two algorithms work together no one algorithm will define or create complete behavior.
The transposer moves the camera in a fixed relationship to the follow target as well as applies an offset and damping.
The framing transposer moves the camera in a fixed screen-space relationship to the Follow Target. This is commonly used for 2D cameras. This algorithm has a wide range of settings to allow you to fine-tune the feel of the camera.
The orbital transposer moves the camera in a variable relationship to the Follow Target, but attempts to align its view with the direction of motion of the Follow Target. This is used in the free-look camera and among other things can be used for a 3rd person camera. I could also imagine this being used for a RTS style camera where the Follow Target is an empty object moving around the scene.
The tracked dolly is used to follow a predefined path - the dolly track. Pretty straightforward.

Dolly track (Green) Path through a Low Poly Urban Scene
Hard lock to target simply sticks the camera at the same position as the Follow Target. The same effect as setting a camera as a child object - but with the added benefit of it being a virtual camera not an actual Unity camera component that has to be managed. Maybe you’re creating a game with vehicles and you want the player to be able to choose their perspective with one or more of those fixed to the position in the vehicle?
The “do nothing” transposer doesn’t move the camera with the Follow Target. This could be useful for a camera that shouldn’t move or should be fixed to another object but might still need to aim or look at a target. Maybe for something like a security-style camera that is fixed on the side of a building but might still rotate to follow the character.
Aim
The Aim controls where the camera is pointed and is determined by which algorithm is used.

The composer works to keep the Look At target in the camera frame. There is a wide range of settings to fine-tune the behavior. These include look-ahead time, damping, dead zone and soft zone settings.
The group composer works just like the composer unless the Look At target is a Cinemachine Target Group. In that case, the field of view and distance will adjust to keep all the targets in view.
The POV rotates the camera based on user input. This allows mouse control in an FPS style.
The “same as follow target” does exactly as a says - which is to set the rotation of the virtual camera to the rotation of the Follow target.
“Hard look at” keeps the Look At target in the center of the camera frame.
Do Nothing. Yep. This one does nothing. While this sounds like an odd design choice, this is used with the 2D camera preset as no rotation or aiming is needed.

Noise
The noise settings allow the virtual camera to simulate camera shake. There are built-in noise profiles, but if that doesn’t do the trick you can also create your own.
Extensions
Cinemachine provides several out-of-the-box extensions that can add additional functionality to your virtual cameras. All the Cinemachine extensions extend the class CinemachineExtension, leaving the door open for developers to create their own extensions if needed. In addition, all existing extensions can also be modified.

Cinemachine Camera Offset applies an offset to the camera. The offset can be applied after the body, aim, noise or after the final processing.
Cinemachine Recomposer adds a final adjustment to the composition of the camera shot. This is intended to be used with Timeline to make manual adjustments.
Cinemachine 3rd Person Aim cancels out any rotation noise and forces a hard look at the target point. This is a bit more sophisticated than a simple “hard look at” as target objects can be filtered by layer and tags can be ignored. Also if an aiming reticule is used the extension will raycast to a target and move the reticule over the object to indicate that the object is targeted or would be hit if a shot was to be fired.
Cinemachine Collider adjusts the final position of the camera to attempt to preserve the line of sight to the Look At target. This is done by moving the camera away from gameObjects that obstruct the view. The obstacles are defined by layers and tags. You can also choose a strategy for moving the camera when an obstacle is encountered.
Cinemachine Confiner prevents the camera from moving outside of a collider. This works in both 2D and 3D projects. It’s a great way to prevent the player from seeing the edge of the world or seeing something they shouldn’t see.

Polygon collider setting limits for where the camera can move
Cinemachine Follow Zoom adjusts the field of view (FOV) of the camera to keep the target the same size on the screen no matter the camera or target position.
Cinemachince Storyboard allows artists and designers to add an image over the top of the camera view. This can be useful for composing scenes and helping to visualize what a scene should look like.
Cinemachine Impulse Listener works together with an Impulse Source to shake the camera. This can be thought of as a real-world camera that is not 100% solid and has some shake. A source could be set on a character’s feet and emit an impulse when the feet hit the ground. The camera could then react to that impulse.
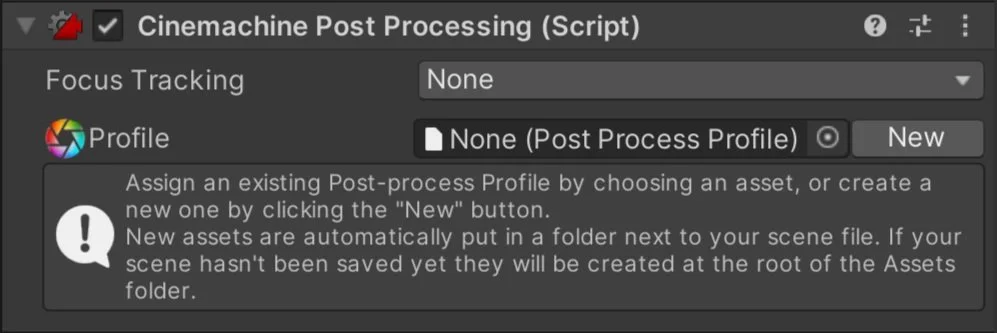
Cinemachine Post Processing allows a postprocessing (V2) profile to be attached to a virtual camera. Which lets each virtual camera have its own style and character.
There are probably even more… but these were the ones I found.
Conclusion?
Cinemachine is nothing short of amazing and a fantastic tool to speed up the development of your game. If you're not using it, you should be. Even if it doesn’t provide the perfect solution that ships with your project it provides a great starting point for quick prototyping.
If there’s a Cinemachine feature you’d like to see in more detail. Leave a comment down below.

A track and Dolly setup in the scene - I just think it looks neat.