Split Screen: New Input System & Cinemachine
Some Background Knowledge ;)
While networked multiplayer is a nightmare that can easily double your development time local split-screen is much much easier to implement. And Unity has made it even easier to do thanks in big part to Unity’s New Input System and some of the tools that it ships with.
So in this tutorial, we’re going to look at a few things:
Using the built-in systems (new input system) to create local multiplayer.
Adding optional split-screen functionality
Modifying controller code for local multiplayer
Responding when players added through C# events
Spawning players at different points on the map.
Toggling objects
Using Cinemachince with split-screen.
We are NOT going to look at creating a player selection screen or menu. But! That is very possible with the system and could be a topic of a future tutorial. There is also a bit of crudeness to how Unity splits the screen. It initially splits left/right not up/down. Also if the split-screen sizes don’t fill the screen which means, for example, 3 player screens will not cover the entire screen. To fix these issues would require some customization that’s beyond the scope of this tutorial.
I’ll be using the character controller from my “Third Person Controller” video for this tutorial. Although any character controller (even just a jumping cube) using the new input system should work equally well. You can find the code for the Third Person Controller here and the code for this tutorial here.

Split Screen in Action
So What is ACTUALLY Happening?
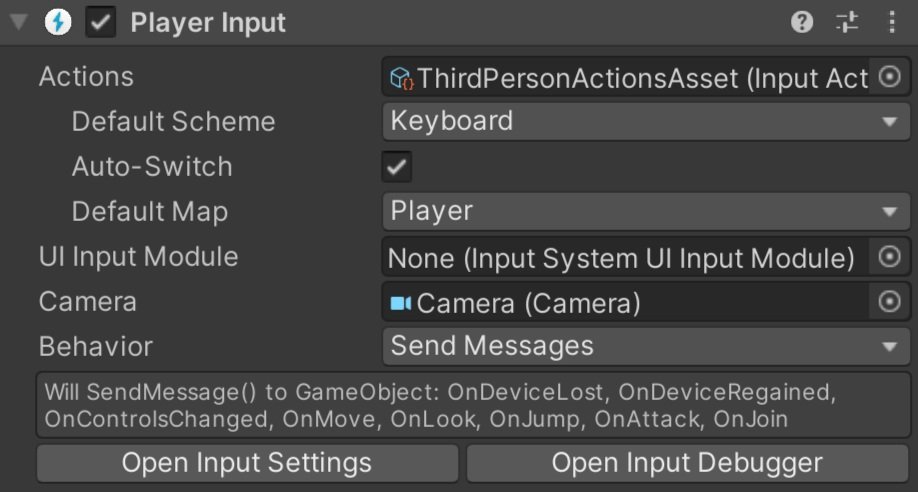
There is a lot going on behind the scenes to create split-screen functionality most of which is handled by two components - Player Input Manager and Player Input. Both of these components ship with the New Input System. While these classes are not simple - 700 and 2000 (!!) lines respectively - the end result is pretty straightforward and relatively easy to use.
The Player Input Manager detects when a button on a new device (keyboard, gamepad, etc) is pressed. When that happens an object with a Player Input component is instantiated. The Player Input creates an instance of an Input Action Asset and assigns the device to that instance.
The object that is instantiated could be the player object but in reality, it’s just holding a reference to the Input Action Asset (via the Player Input component) for a given player and device. So if you do want to allow players to select their character, or perform some other action before jumping into the game, you could connect the character selection UI elements to the Input Action Asset and then when the player object is finally created you connect it to the Input Action Asset. This becomes easier if you create additional action maps - one for selection and one for in-game action.
The Basics

To get things started you’ll need to add in the New Input System through the Unity Package Manager. If you haven’t played with the New Input System, definitely check out the earlier post and video covering the basics.
Here’s what needs to happen:
Add the New Input System to your project
Create an Input Action Asset. (Saved it and generate C# class)
Add the Player Input Manager component to a scene object.
Create a “player” prefab and add the Player Input component.
Assign the Input Action Asset to the Player Input component.
Assign the player prefab to the Player Input Manager component.
With that done, kick Unity into play mode and press a button on your keyboard or mouse. You should see a character prefab get instantiated. If you have a controller press a button on it and another prefab should be created.
In some cases, I have seen Unity treat multiple devices all as one. This occurred when I connected the devices before setting up the Player Input Manager. For me, a quick restart of Unity resolved this issue.
A Little Refinement
I have had some issues with Unity detecting the mouse and keyboard as separate devices. One way to resolve this is by defining control schemes, but I haven’t found the secret sauce to make that work smoothly and consistently. Another way around this is in the Player Input Manager is to set “Join Behavior” to “Join Players When Join Action Is Triggered" and to create a Join action in the Input Action Asset. I set the join action to “any key” on the keyboard and the “start” button on a gamepad.
If you want your players to all play with the same camera, i.e. all have the same view for a co-op style game, then much of the next section can be skipped.
Adding Split Screen
If you want each player to have their own camera for example, in an FPS, the next step is to make sure that the player prefab has a camera component - this is important so that when each player object is instantiated it has it’s own camera object.

The structure of my Player PRefab
In my case, the camera and the player object need to be separate objects and I’d guess this is true for many games. To make this work, simply create an empty object and make the camera and player objects children of the empty. Then create a new prefab from the empty object (with attached children) and reassign this prefab to the Player Input Manager. The Player Input component (in my experience) can go on any object on the prefab - so put it where it makes the most sense to you - I kept mine on the player object itself rather than on the empty parent.
You may have noticed that the Player Input component has a camera object. So on the prefab, assign the camera to the slot. This is needed so the split-screen can be set up correctly.
The last step before testing is to click the “split screen” toggle on the Player Input Manager. If you are using Cinemachine for your camera control, you should still get split-screen functionality, but all the views are likely looking through the same camera. We’ll fix that in a bit.
Connection to the Input Action Asset

Old code is commented out. New code is directly below.
If you’ve been playing around with a player object that has a controller component you may have noticed that all the players are still being controlled by a single device - even if you have split-screen working.
To fix this we need that controller component to reference the Input Action Asset on the Player Input component. To do that we need to change the type of our Input Action Asset from whatever specific type you’ve created, in my case “Third Person Action Asset,” to the more general “Input Action Asset.” We can then get a reference to the Player Input component with GetComponent or GetComponentInChildren depending on the structure and location of your components. To access the actual Input Action Asset we need to add a “dot Actions” to the end.
Now for the messy bit. Since there is no way to know what type of Input Action Asset we’ve created we need to find the Action Maps and individual actions using strings. Yuck. But it works.
We can get references to action maps using FindActionsMaps and references to actions using FindActions. Take care to spell the names correctly and with the correct capitalization. And this is all we need to do. Update the references to the Input Action Asset, Action Maps, and Actions and the rest of your controller code can stay the same.
Give it a quick test and each player object should now be controlled by a unique device.
Reacting to Players Joining

If you want to control where players spawn or maybe turn off a scene overview camera once the first player spawns we’re going to need to add in a bit more functionality. Unity gives us an OnPlayerJoin (and OnPlayerLeft) action that we can subscribe to and allows us to do stuff when a player joins. In addition, the OnPlayerJoin Action sends a reference to the PlayerInput component - which turns out to be very useful.
To make use of this action, we need to change the “Notification Behavior” on the Player Input Manager to “Invoke C Sharp Events.” Unity won’t throw errors if this isn’t set correctly, but the actions won’t get invoked.
Spawn Locations

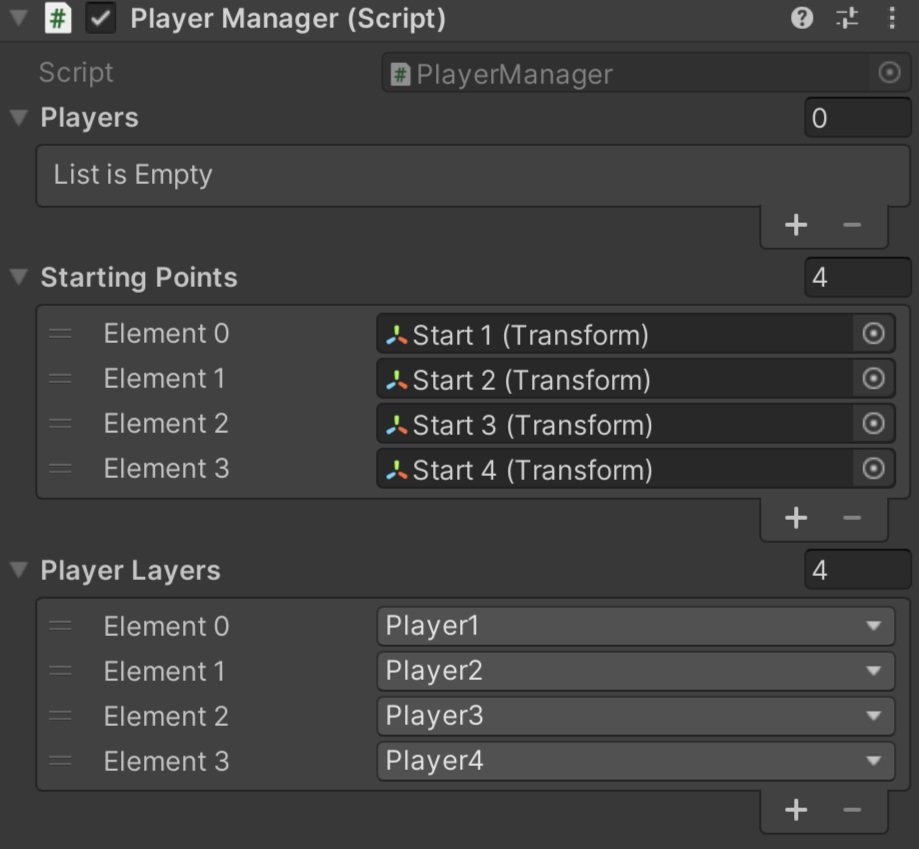
To demonstrate how to control where players spawn, let’s create a new PlayerManager class. This class will need access to UnityEngine.InputSystem so make sure to add that using statement to the top. The first task is to get a reference to the PlayerInputManager component and I’ve done that with FindObjectOfType. We can then subscribe and unsubscribe from the OnPlayerJoin action. In my case, I’ve subscribed an “AddPlayer” function that takes in the PlayerInput component.
There are several ways to make this work, but I choose to create a list of the PlayerInput components - effectively keeping a reference to all the spawned players - as well as a list of transforms that will function as in-game spawn points. These spawn points can be anything, but I used empty gameObjects.
When a player joins, I add the PlayerInput component to the list and then set the position of the player object to the corresponding transform’s position in the spawn list. I’ve kept it simple, so that player 1 always spawns in the first location, player 2 in the second location, and so on.
Because of the structure of my player prefab, I am setting the position of the parent not the character object. My player input component is also not on the prefab root object. So your code may look a bit different if your prefab is structured differently.
Toggling Objects on Player Join

If the only camera objects in your scene are part of the player objects that means that players see a black screen until the first player joins. Which is fine for testing, but isn’t exactly polished.
A quick way to fix this is to add a camera to the scene and attach a component that will toggle the camera off when a player joins. You could leave the camera on, but this would make the computer work harder than it needs to as it’s having to do an additional and unseen rendering.
So just like above when controlling the spawn location, we need a new component that has access to the Input System and will subscribe to the OnPlayerJoin action. Then we just need a simple function, subscribed to the action, that will toggle the gameObject off. Couldn’t be simpler.
This of course can be extended and used in as many systems as you need. Play a sound effect, update UI, whatever.
Cinemachine!
If you are using more than one camera with Cinemachine it’s going to take a bit more work. We need to get each virtual camera working with the corresponding Cinemachine Brain. This is done by putting the virtual camera on a specific layer and then setting the camera’s culling mask accordingly.
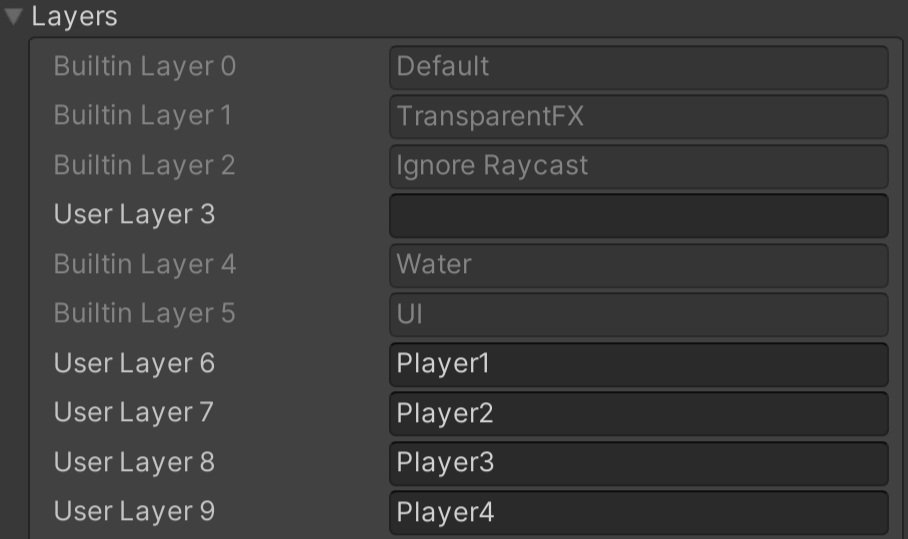
The first step is to create new layers - one for each possible player. In my case, I’ve set the player limit in the Player Input Manager component to 4 and I’ve created four layers called Player1 through Player4.
To make this easier, or really just a bit less error-prone once set up, I‘ve added a list of layer masks to the Player Manager component. One layer mask for each player that can be added. The value for the layer masks can then be set in the inspector - nice and easy.

Same Add Player Function from above
Then comes the ugly part. Layer masks are bit masks and layers are integers. Ugh. I’m sure there are other ways to do this but our first step is to convert our player layer mask (bitmask) to a layer (integer). So in our Player Manager component and in the Add Player function, we do the conversion with a base 2 logarithm - think powers of 2 and binary.
Next, we need to get references to the camera and virtual camera. In my case the Player Input component (which is what we get a reference to from the OnPlayerJoin action) is not on the parent object, so I first need to get a reference to the parent transform and then search for the CinemachineFreeLook and Camera components in the children. If you are using a different virtual camera you’ll need to search for the type you are using.
Once we have reference to the Cinemachine Virtual Camera component we can set the gameObject layer to the layer integer value we created above.
Go to 9:00 on the video for bitwise operations.
For the camera’s culling mask it’s a bit more work as we don’t want to just set the layer mask we need to add our player layer to the mask. This gets done with the black magic that is bitwise operations. Code Monkey has a pretty decent video explaining some of how this works (go to the 9:00 mark) albeit in a slightly different context.
If everything is set up correctly, we should be able to test our code and have each Cinemachine camera looking at the correct player.
But! You might still see an issue - depending on your camera and how it’s being controlled.
Cinemachine Input Handler
If you are using a Cinemachine Input Handler to control your camera you are likely still seeing all the cameras controlled by one device. This is because the Cinemachine Input Handler is using an Input Action Reference which connects to the Input Action Asset - the scriptable object version - not the instance of the Input Action Asset in the Player Input component. (You’ve got to love the naming…)
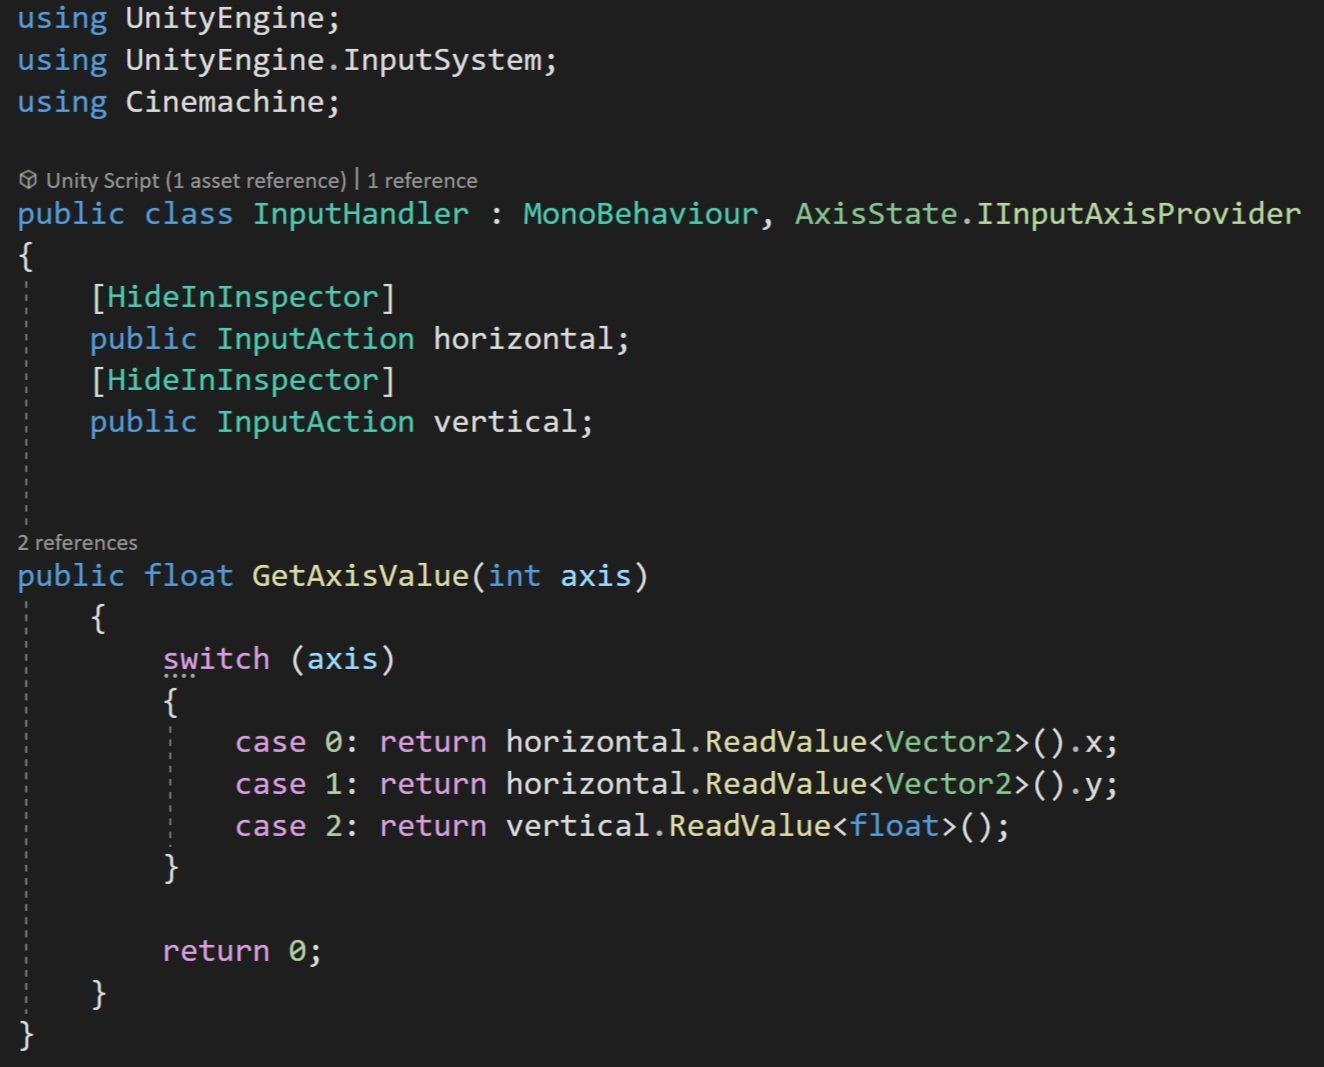
To fix this we are going to create our own Input Handler - so we’ll copy and modify the “Get Axis Value” function from the original Cinemachine Input Handler. This function takes in an integer related to an axis and returns a float value from the corresponding action.
Note that this component implements the IInputAxisProvider interface. This is what the Cinemachine virtual camera looks for to get the input.
Replace the Cinemachine Input Handler with this new component and you should be good to go.