Dev Log
Save and Load Framework
In past games, I’ve had some save and load functionality, but it was pretty simple stuff. With Grub Gauntlet, I essentially just had to store the postion, rotation and object type data of different gameObjects. Which meant that all that needed to be done was iterate through the objects and save the three pieces of data for each object.
Loading was the inverse, iterating through the list and instantating by the saved type. Super easy.
My next (current) project was more complicated and was going to need something more in the save and load department.
But first a quick disclaimer. This post is NOT about creating a system to serialize your data and write to a file. This post is about taking the sizeable problem of saving a complex game state and breaking that down into smaller manageable chunks. And I’ve done that by creating a framework or pattern that lays the foundation for a scalable and manageble complete save and load system. If you’re looking for serialization and saving to a file, and happen to be using Unity, I highly highyl recommend Easy Save. It’s worth every dollar.
Needing Something More
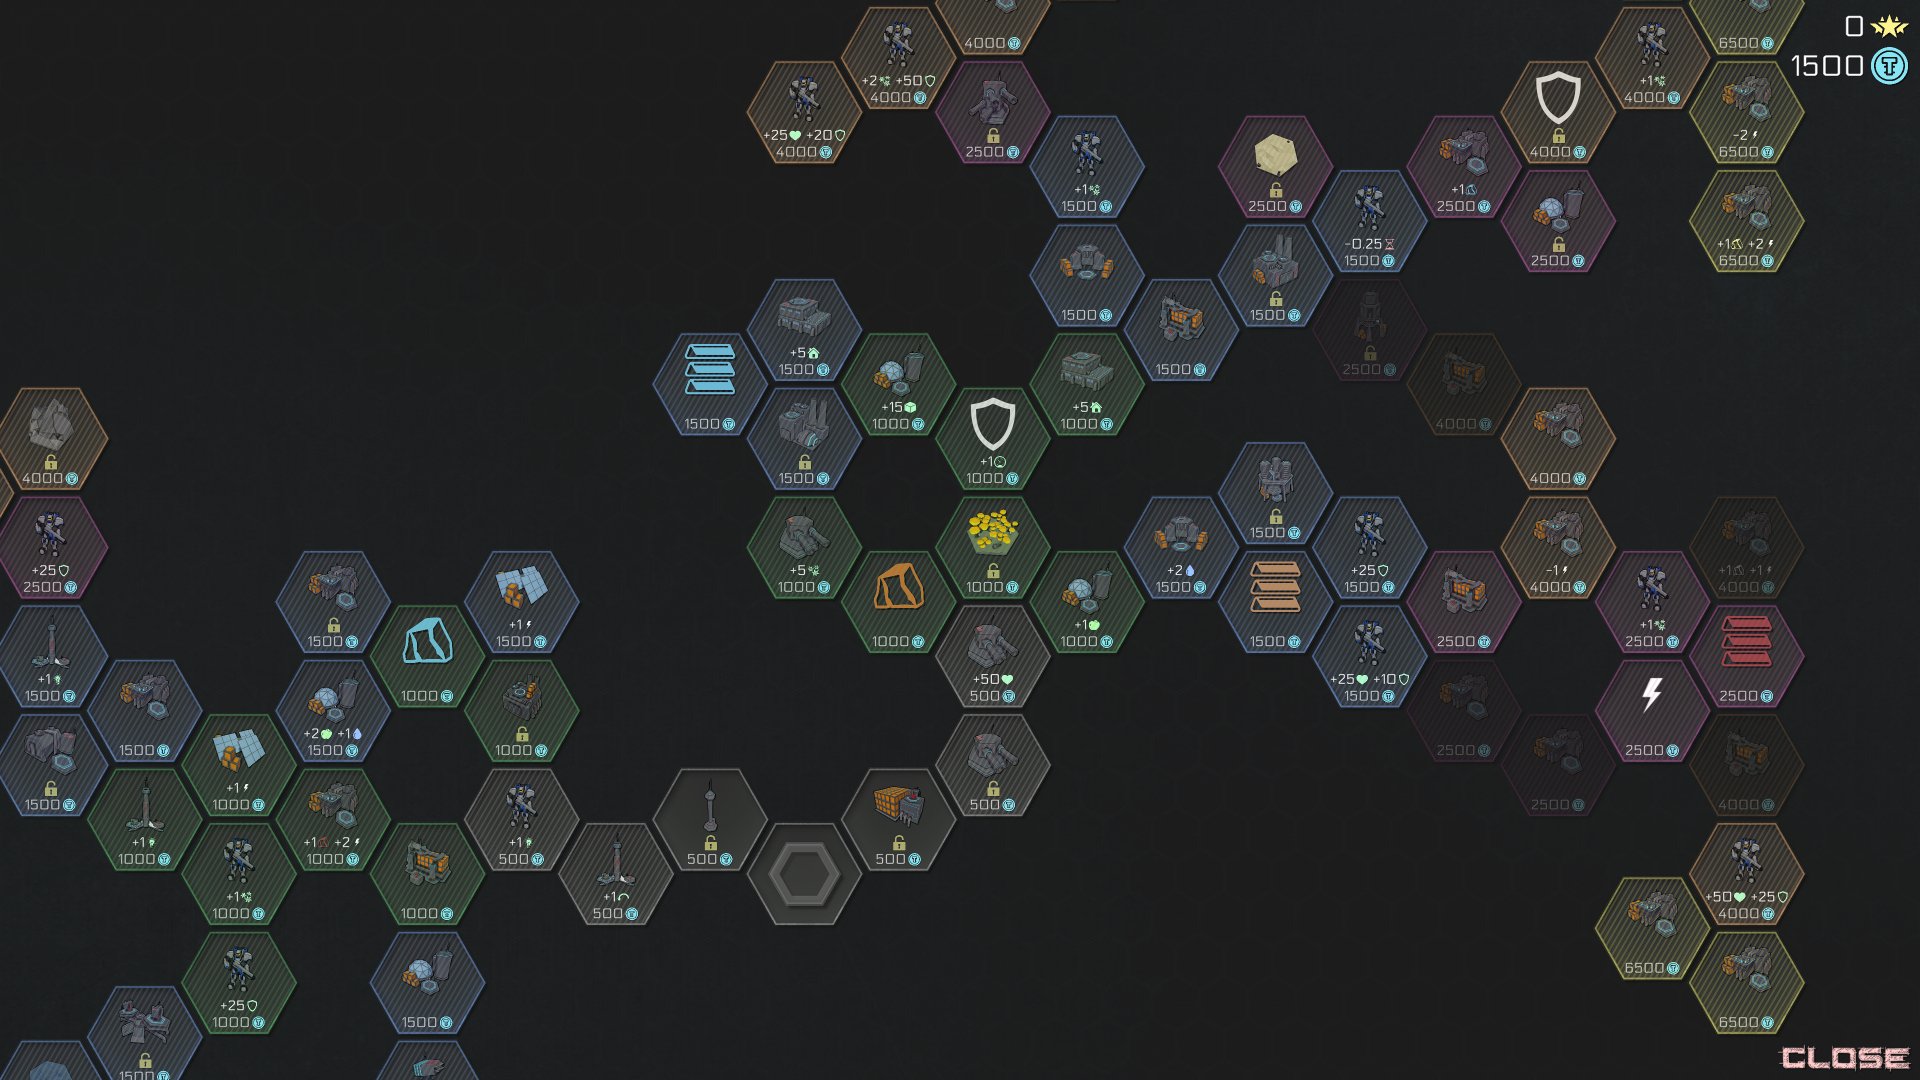
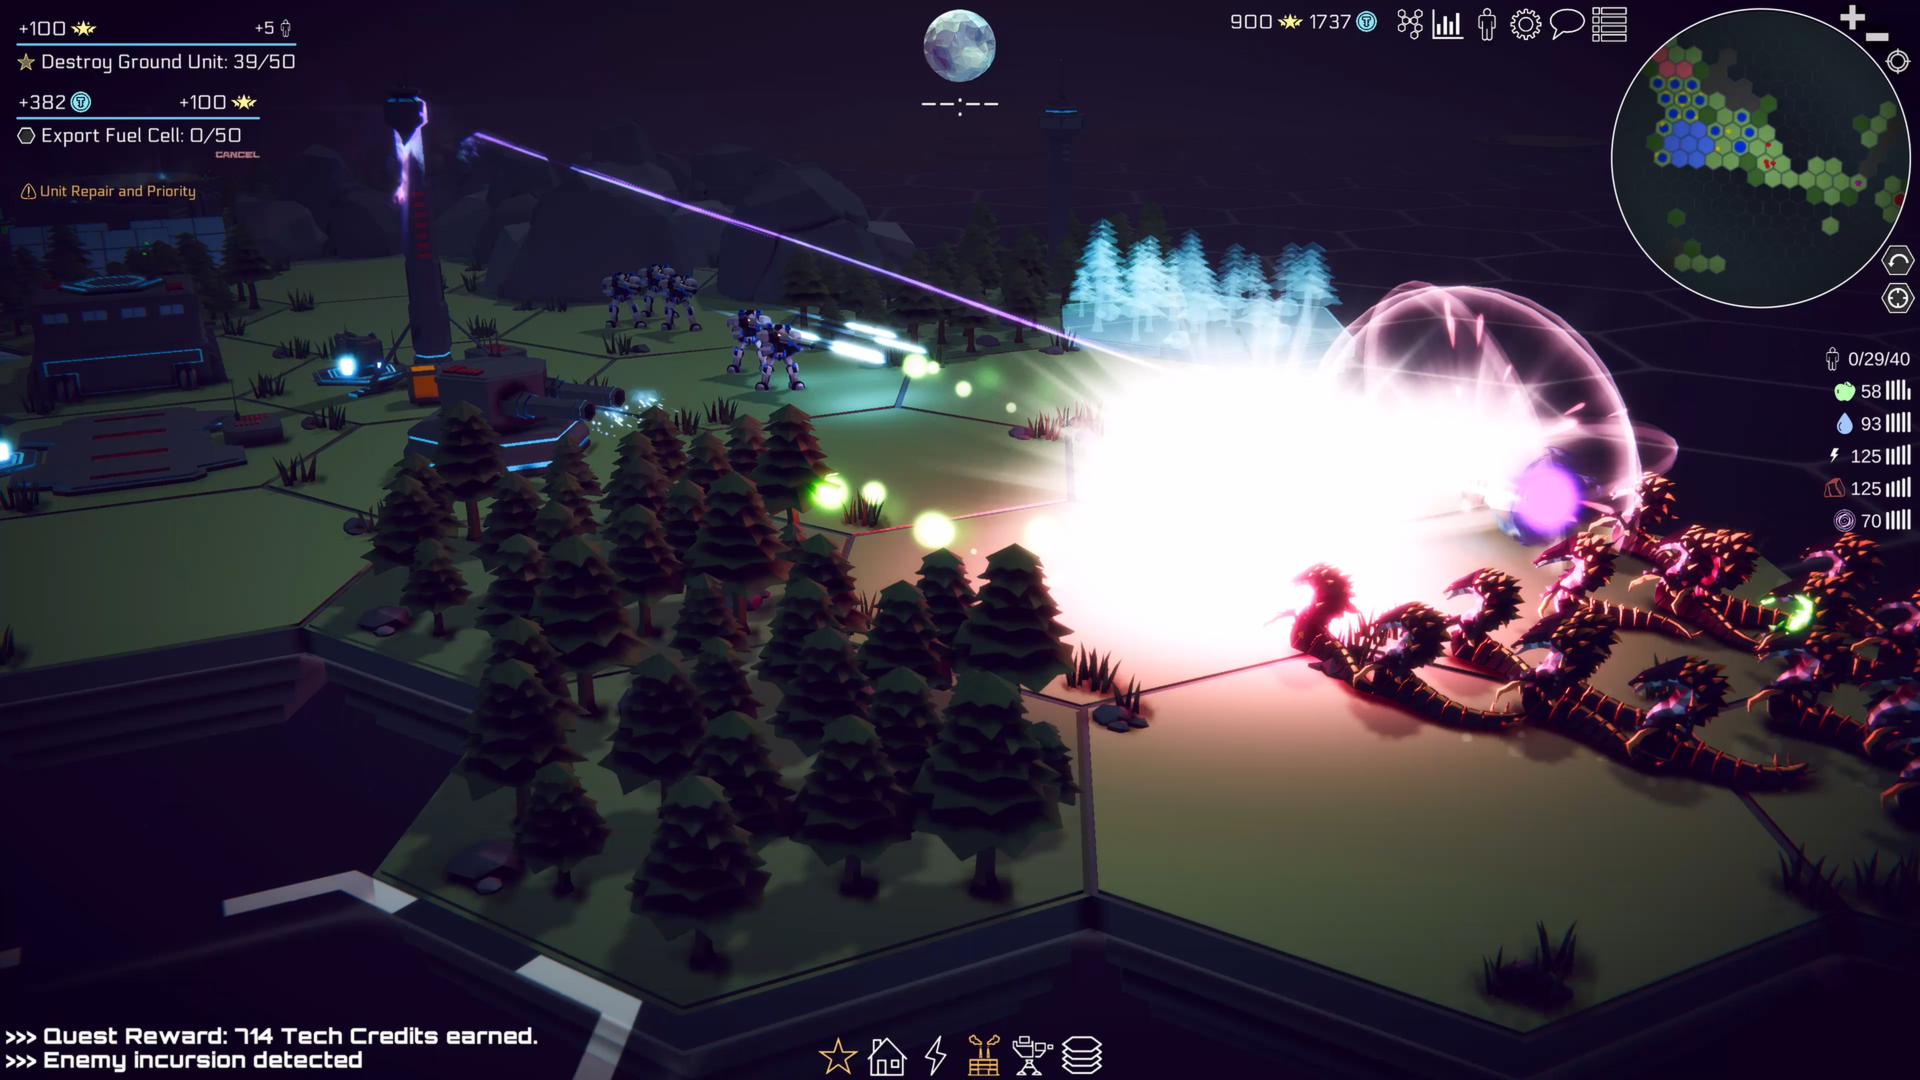
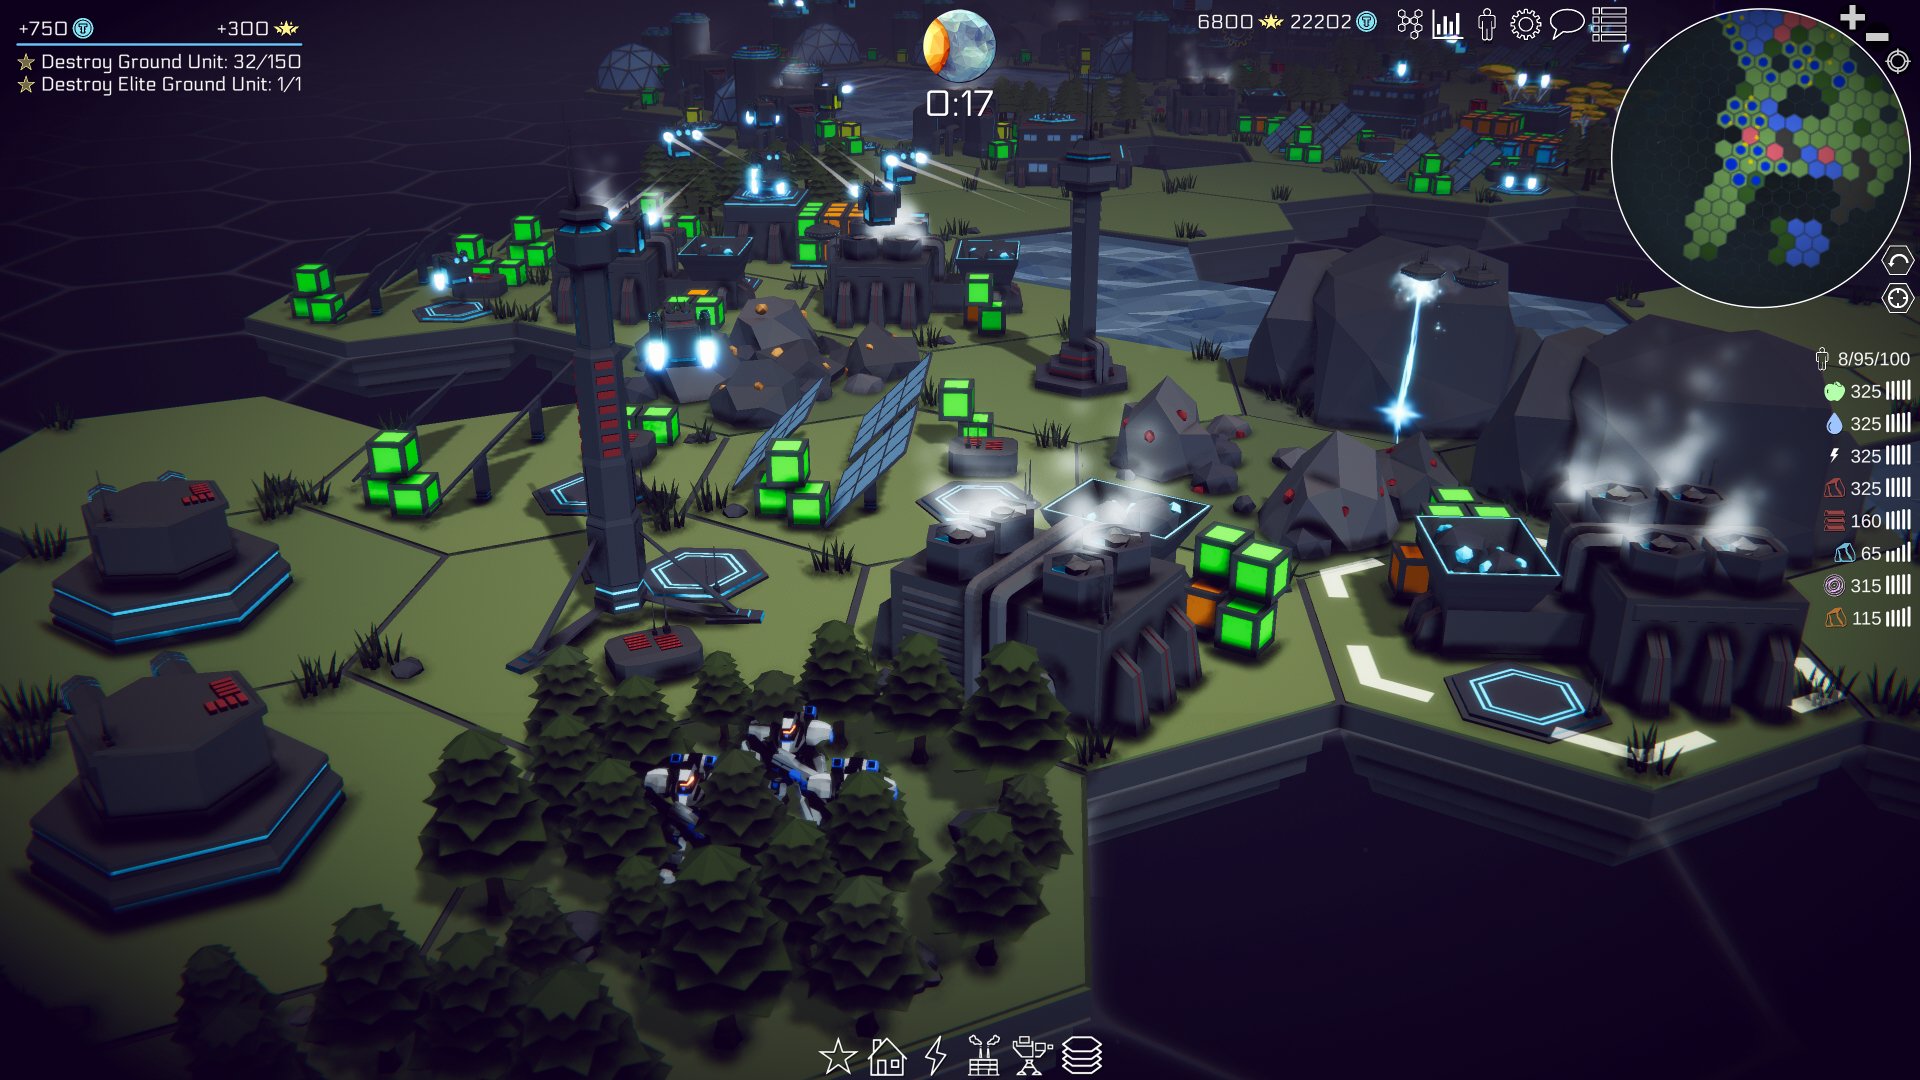
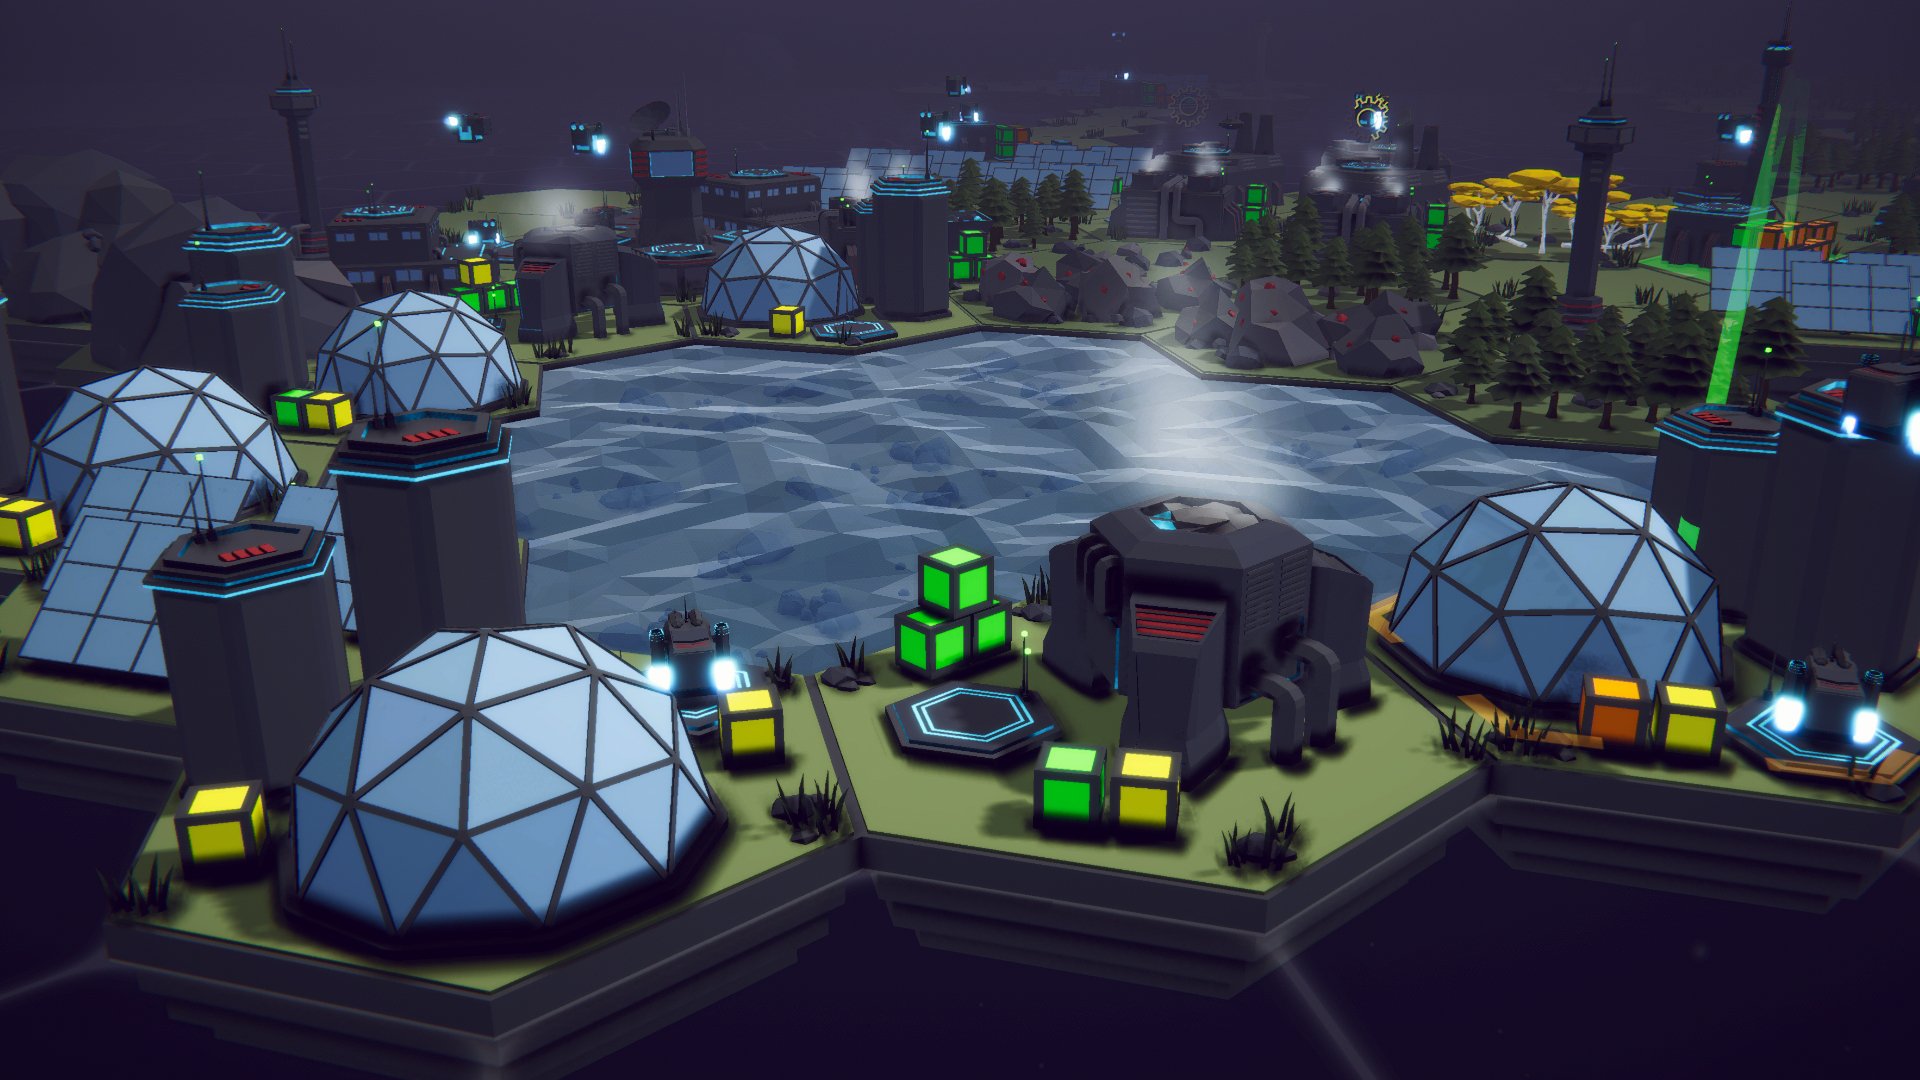
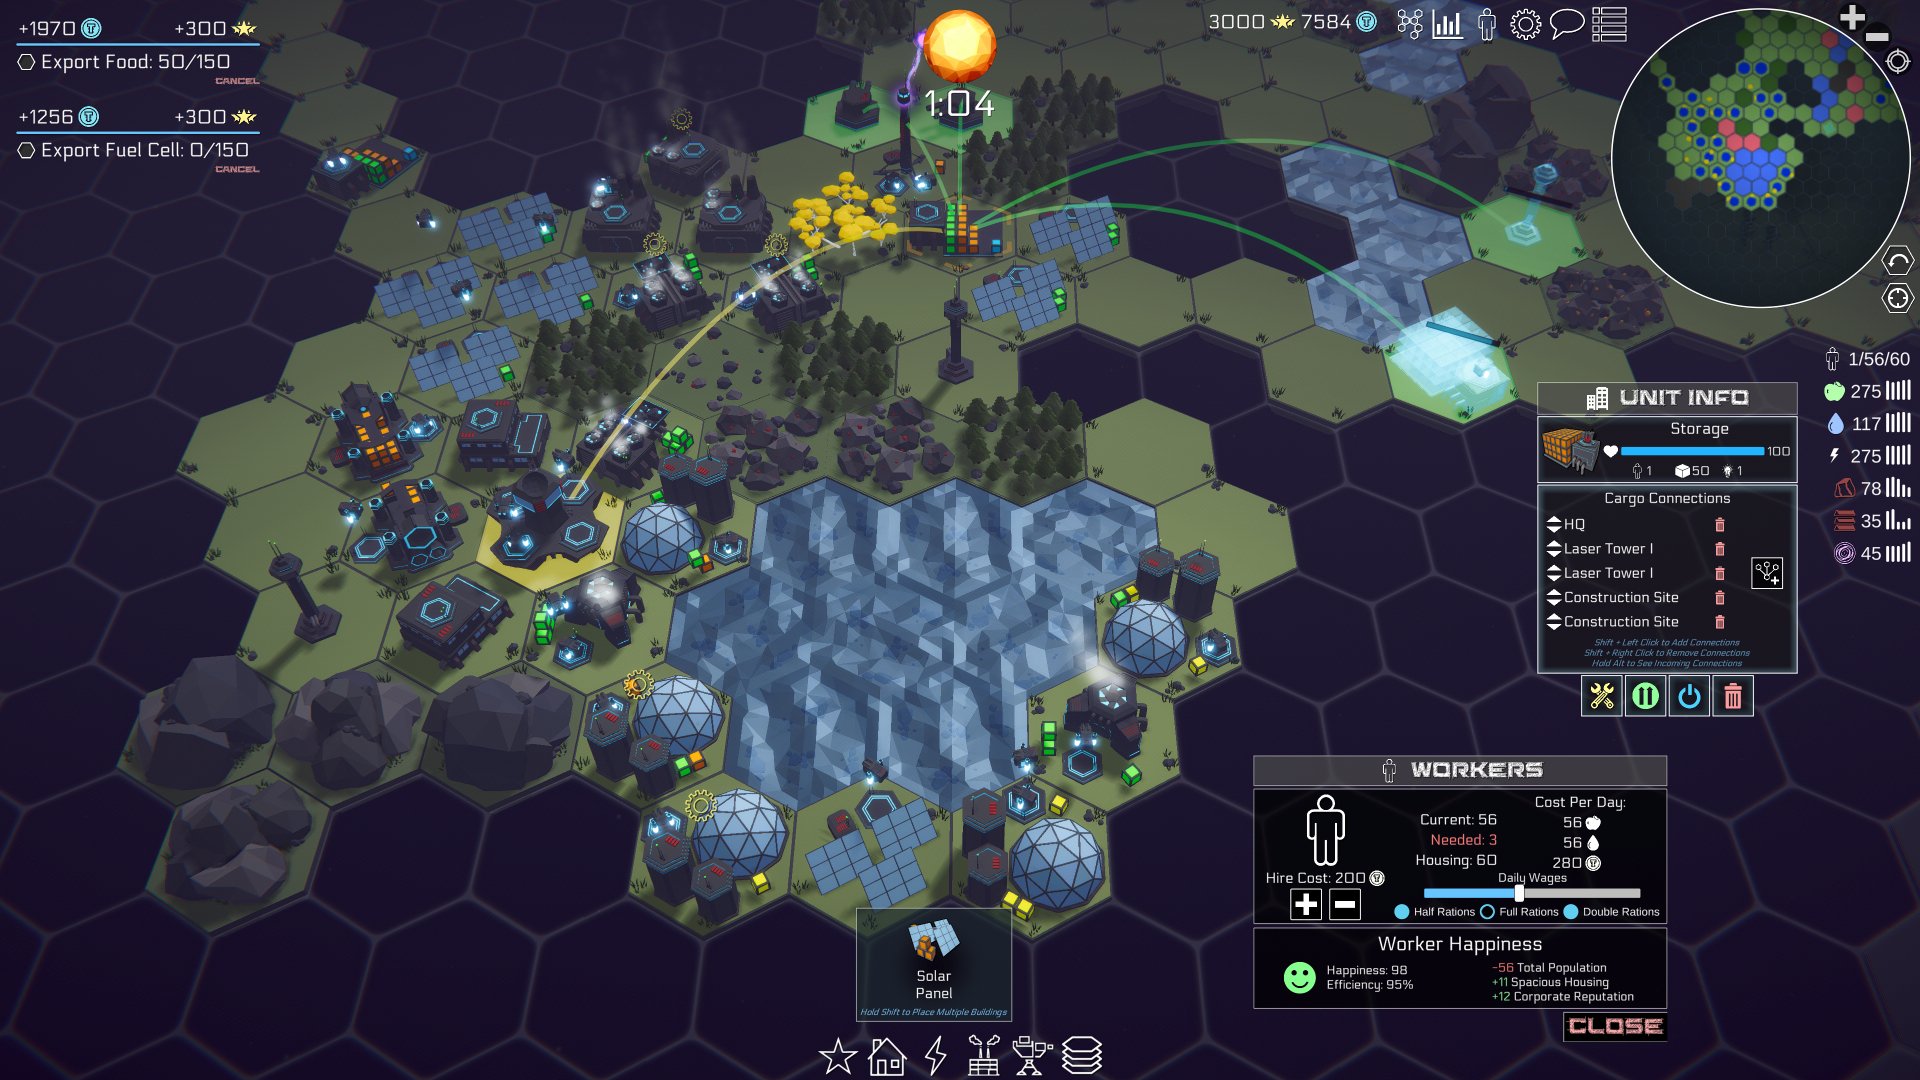
Deep Space Directive (my third published game) is a resouce managment game with dozens of different resouces and almost as many buildings that create, process and modify and those resources. With that comes the complexity of inventory, stats, transport systems, tech trees, upgrades and a whole lot more.
Iterating through the scene objects and attempting to save the data object by object - wasn’t going to work and certainly wasn’t going to scale well as new mechanics got added to the game.
To be honest, I was dreading figuring out the save system. I kept putting it off and putting it off. Maybe even hoping the game would magically simplify itself and not need much of a save system… Wishful thinking!
Then somehow I stumbled on to a simple idea and it all came together - surprisingly quickly.
How It Works
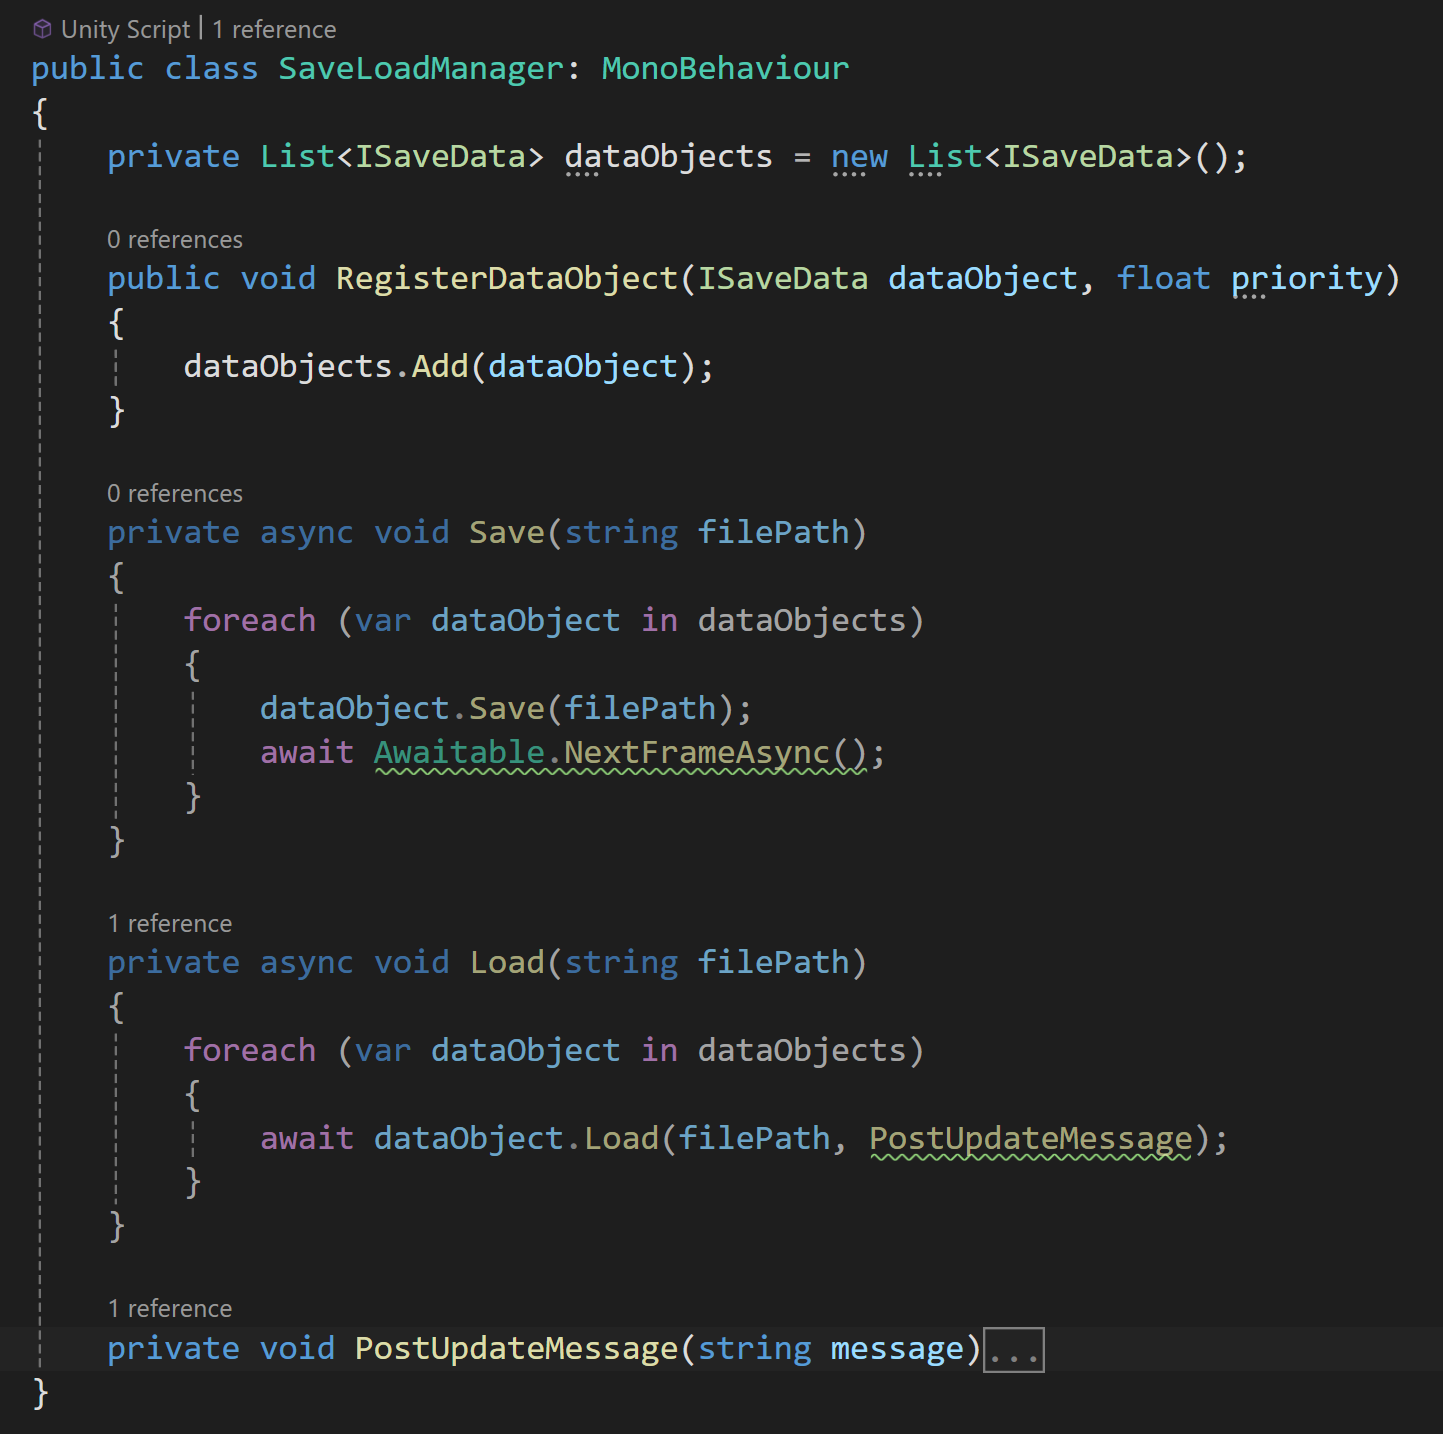
Rather than create a giant monolithic class that somehow magically reaches out into the scene and grabs all the data… I created a single manger class and a simple interface.
The classes implementing the interface get to deal with their own save and load issues. Keeping objects responsible for their own data - while allowing much of the data to be private and local to a class without a mess of public getters or such things. It also means that each chunk of save code is smaller and easier to understand and modify.
The manager class then maintains a collection of classes that implement the interface. This collection is populated by the classes registering and unregistering themselves with the manager. Then when its time to save or load - the manager would call the respective public function from the interface to start the saving or loading for each of the objects in the collection.
Now that write it out… it seems obvious. Simple and easy. Not to mention very scalable when adding new game mechanics. While the system has gone through some iterations and improvements the basic idea has stayed the same throughout the development of the game and has been in use for well over a year.
ISaveData
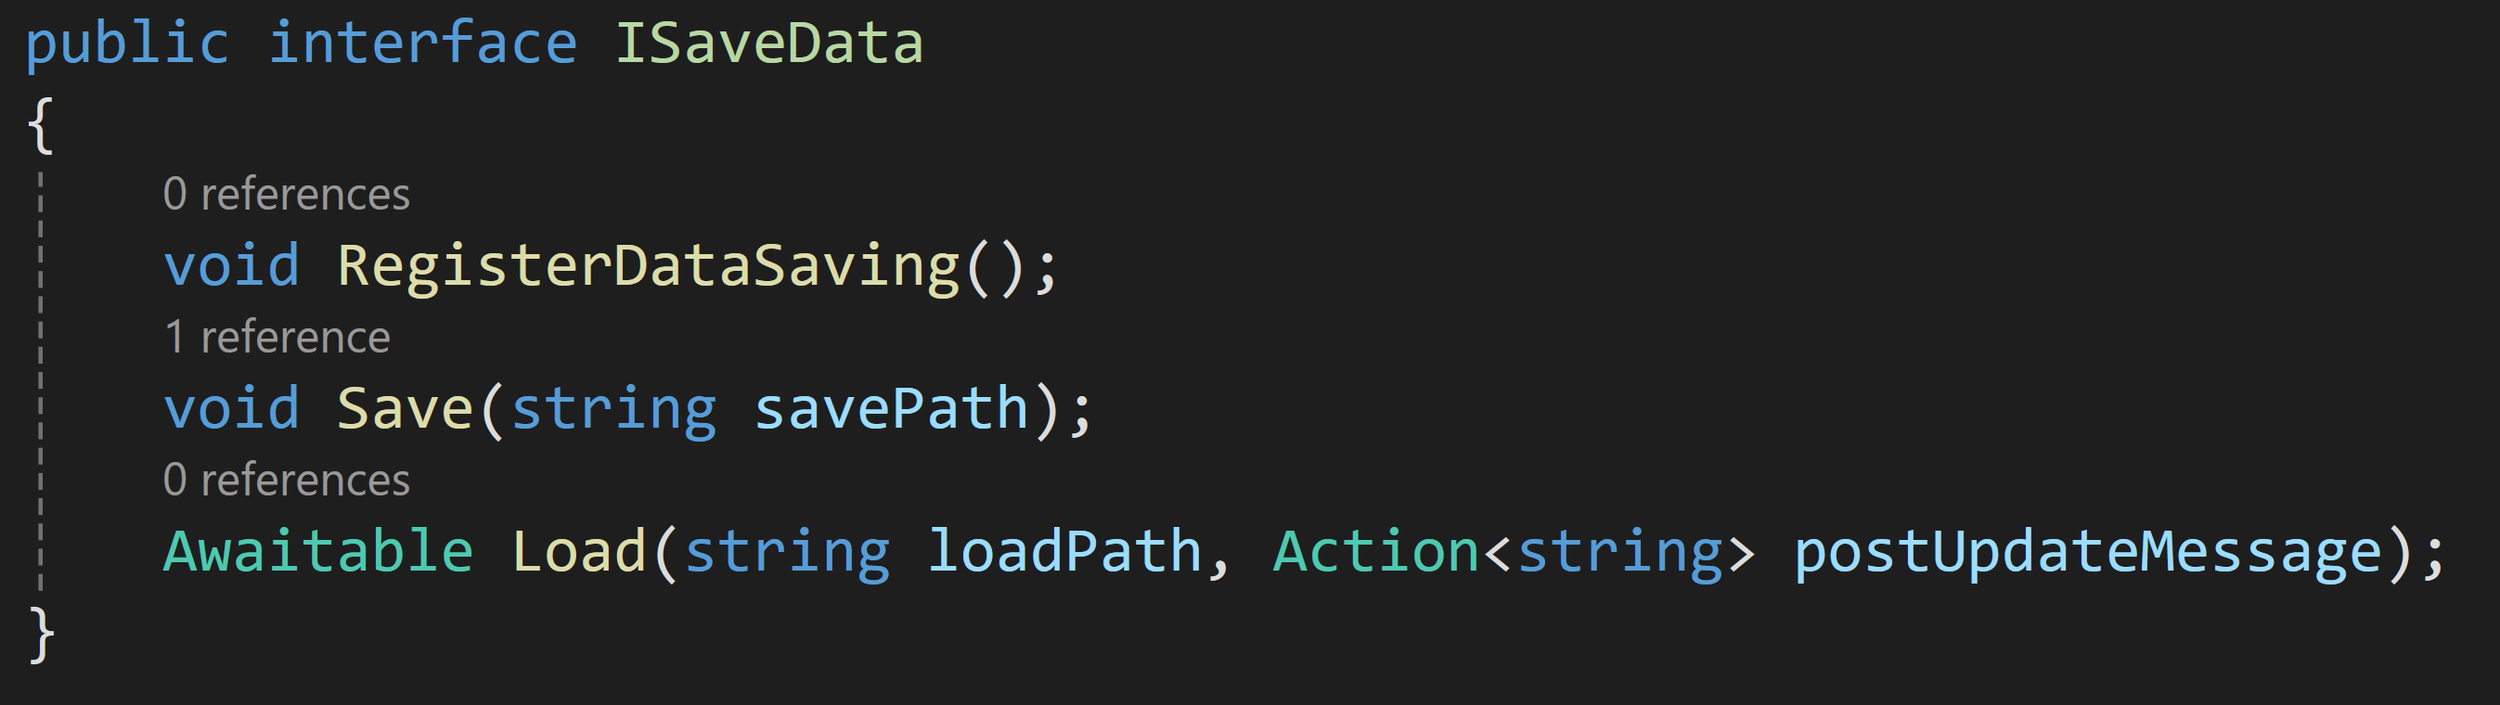
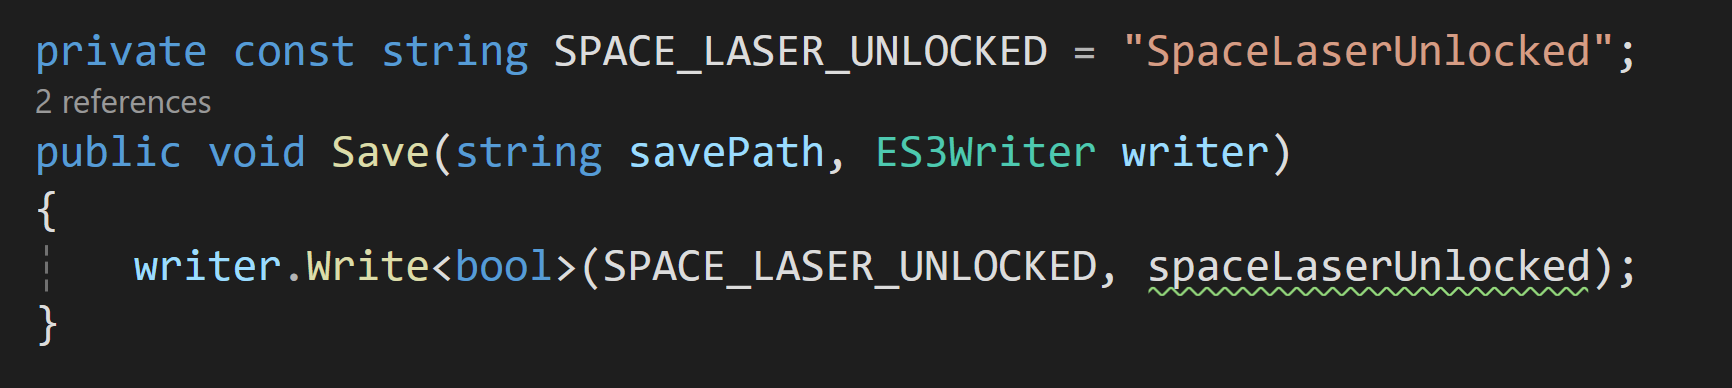
The interface has 3 functions, only 2 of which are strictly needed. The RegisterDataSaving function is not necessary, but was an attempt to remind myself that I needed to register the class with the manger… I still forget about half the time.
The save function takes in a file path and does what ever data processing that needs to happen. Sometimes it’s super simple and short. Other times it gets messy. Whatever the class needs. But! The class handles it all by itself. Keeping good separate or tasks and roles.
The load function has been through more changes than any other part of the system. It started as a vanilla function, then at some point it became a coroutine and most recently with the ease of use of Unity’s awaitable functions it has become an async function.
For my projects, the process of loading and instantiating all of the scene objects makes some sort of aysnc functionality a necessity to spread the load over mulitple frames. In my case I have 10’s of thousands of hex tiles that need to be instantiated and trying to do that all in a single frame simply isn’t a good experience.
Awaiting the actual load functions also allows classes with more complex loading to wait additonal frames - for example waiting after every 20 or 50 tiles are instantiated, not just once after all 10,000 tiles were instantiated.
I’ve also added an action parameter to the load function. I use it to post update messages so the player can see that something is happening while waiting for the file to load. This enables each class to send it’s own customized update message and make use of any internal data in that message - for example giving an accurate count of tiles created or what types of building is being added.
SaveLoadManager
As mentioned before, each class that implements the ISaveData interface will register itself with the SaveLoadManager. The SaveLoadManager then adds the interace to a collection.
When it comes time to save, the manager iterates through the collection and calls Save on all of the classes implementing ISaveData and similiarly the manager calls Load when its time to the load data into the scene.
To hit on it again, one of the main motivations for creating this framework was getting access to the necessary data - much of the data that needs to be saved is private or local within each class. This left me with the options of making everything public, adding public getters, or trying to wrap all the data in some sort of data container that can be passed back and forth. None of these seemed very palatable or scalable.
So instead, by a class implementing the ISaveData interface, the Save and Load functions automatically have access to all of the class wide data. This means that each class is responsible for it’s own saving and loading! Which has the fanastic added benefit that when I create a new object (a new game mechanic) that needs to save or load data I don’t have modifiy the SaveLoadManager class - at all!
Nice and tidy.
And that’s kind of it. That’s the main idea. For many of you this might be all you need to role your own version of this system. But! We can add a few more useful details.
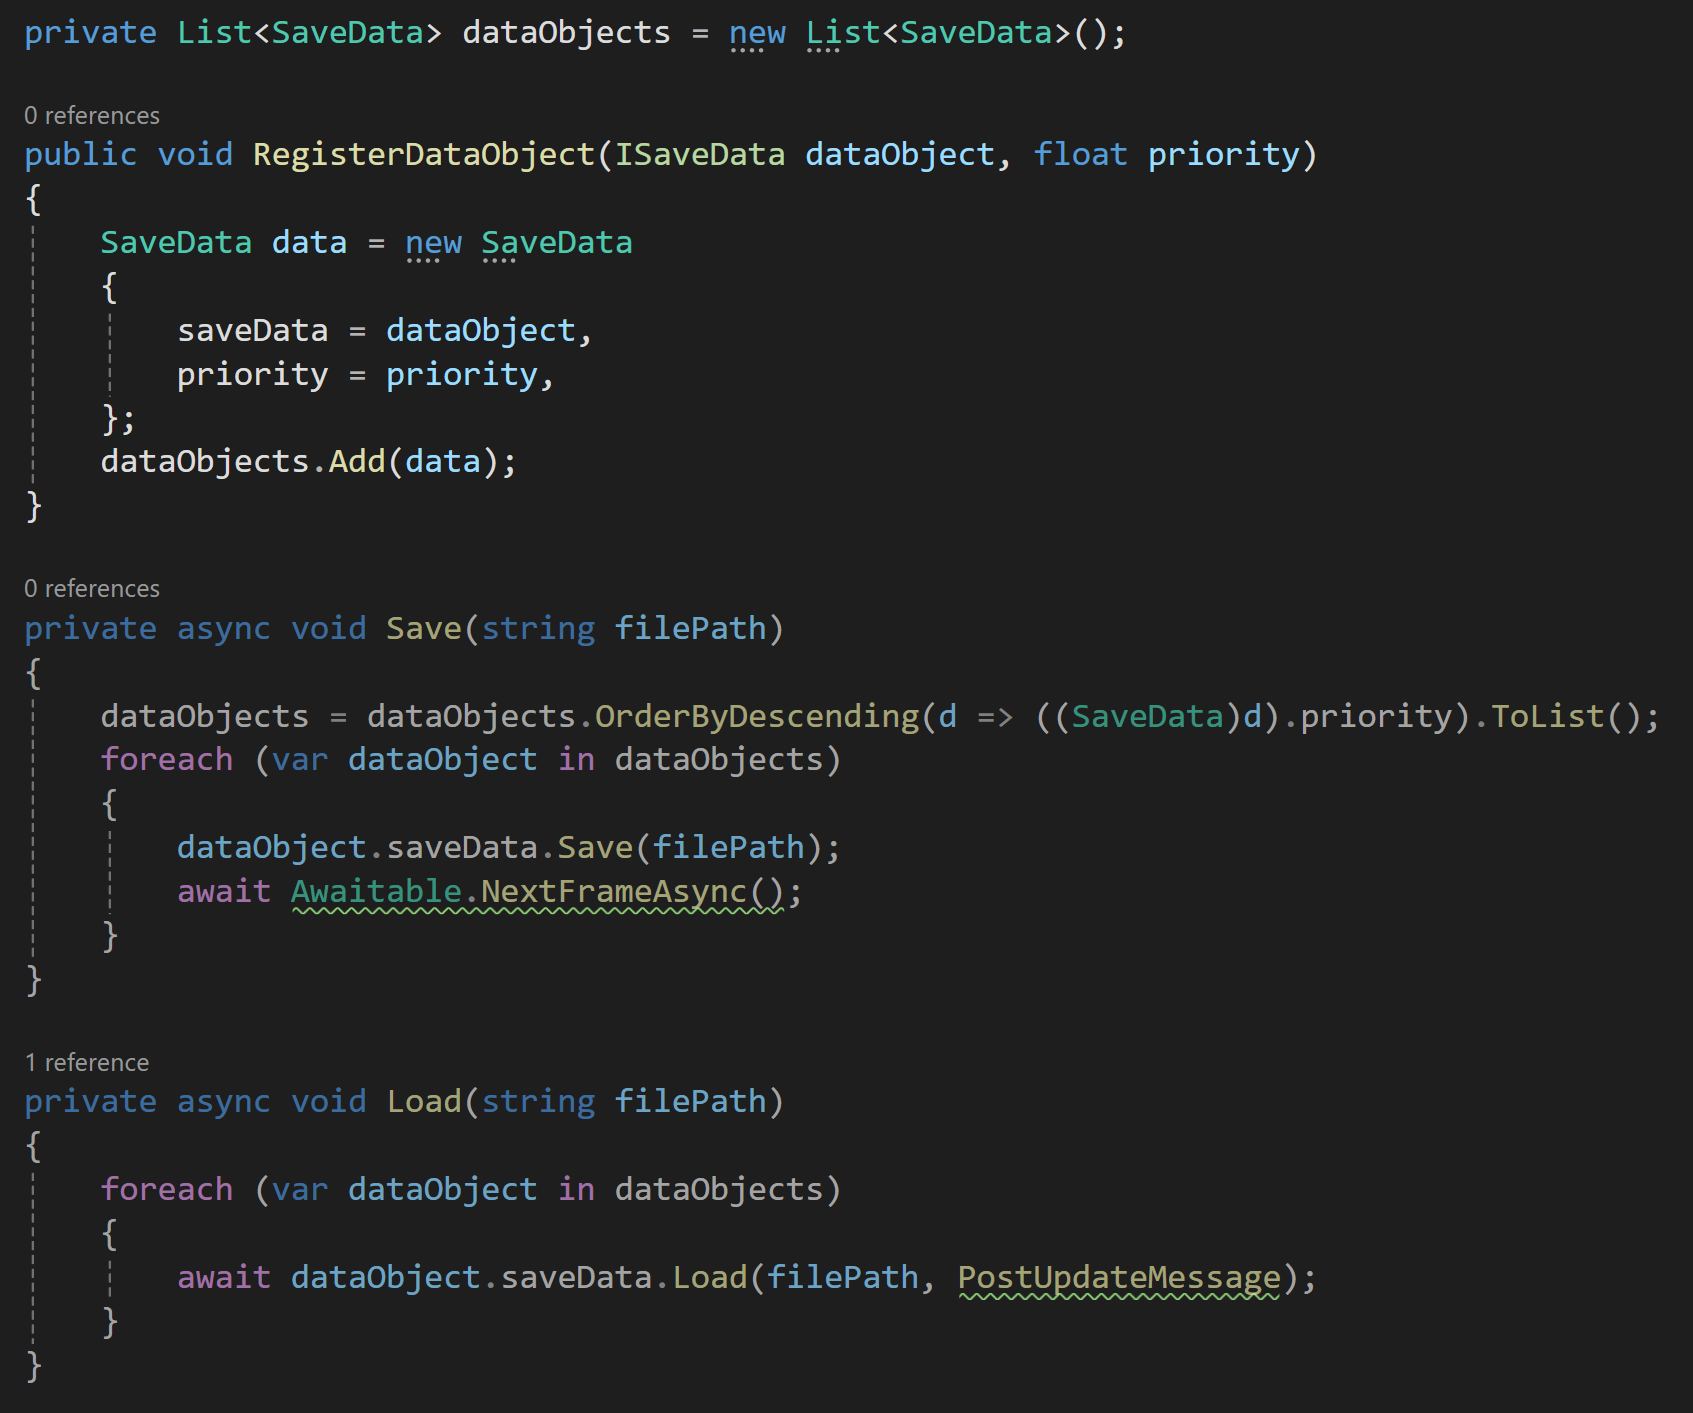
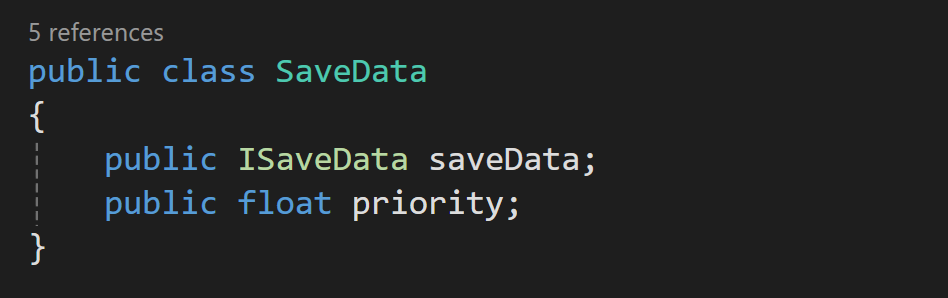
Modified to allow priority registration
Priority Registration
For some systems and some data, save and load order doesn’t matter, but for other systems it definitely does! To handle this, I made a few adjustments to the system. I added a data container class, SaveData, that holds a reference to the ISaveData object as well as to a priority value.
So when registering with the SaveLoadManager each interface can set a priority value. Then before calling Save or Load the manager class can sort the collection by priority to ensure the data is handled in the correct order.
Again, nice and tidy all while giving good control.
Real World Application
All too often nice and tidy solutions are presented on the internet without the complexity that occurs with real world application. While this framework is solid and I’ve been using it for well over a year. There are some issues I’ve run into that I felt were worth acknowledging. They aren’t inheritant to this framework, but nonentheless might be issues others will run into as well.
File Validation
The save process can be long and if something goes wrong in the middle it’s very possible the save process doesn’t complete. If this then partially saved file is then loaded… bad things can happen.
I went through several iterations trying to solve this problem. But the final one is the simplest and has seemly been robust enough. Before saving any game data, I set a boolean “SaveComplete” to false. Then after all the game data is saved I set it back to true.
This gives me an easy value to check and "validate” the file before loading or showing the file in a loading dialog.
Save Performance

Saving can be a slow process, it certainly was in my game, and it can interrupt the players experience. Saving over multiple frames can be an okay solution, but could also potentially cause some synchronization issues if data changes during those frames. Just something to keep in mind as you build your system.
In my case spreading the saving out over several frames was still too slow and I needed something more.
So I went looking for ways to optimize the saving. Using Easy Save 3, each time I called ES3.Save a writer is opened and closed. Normally this isn’t a big deal or even noticealbe. But when saving data for 10,000 tiles it gets really slow.
I’m sure this isn’t unique to Easy Save 3, but the work around was to pass in a reference to a writer into the Save function. This means a writer only gets created once and closed once per save. This took my save process from a very noticeable lag spike to barely noticeable. The improvement was enough that I was able to implement a proper autosave system that fires off with the start of each in game day and most players can’t tell it happened.
Who Saves Data?
In general, in my game only “manager” style classes are implementing the ISaveData interface. More important than being “managers,” these objects exist on scene load and their existance is not dependent on the state of the game or the save file.
Objects that don’t exist on scene load aren’t there and can’t load data, so if that data needs to be loaded it needs to be done through a manager style object.
My game scene is largely empty with mostly just UI and managers objects until entering play mode. If your game is built differently, with most or all objects in the scene at edit time, then the use of the interface may be spread around to a larger number of objects. Each project will have its own needs.
Final Two Cents
That’s all I’ve got. As a framework its pretty simple and easy to implement. I’ve found that the framework is easily maintainable and I’ve had no issues, as the game has grown, adding new mechanics and systems. It’s not exagerating to say that breaking the larger problem of saving the game state into a bunch of smaller problems took what felt like an insurmountable challenge and turned into many smaller fairly easy to complete tasks.
Ready for Steam Next Fest? - Polishing a Steam Page
The days are counting down to Steam Next Fest - June 10th. So April was slated be all about getting the Steam page up to snuff. Or at least the best I could manage with my current skills.
The page needed new screenshots, updated GIFs, a trailer (finally), and a capsule image that didn’t look like I made it one-handed while brushing my teeth.
It's a short list but not an easy list.
Screenshots

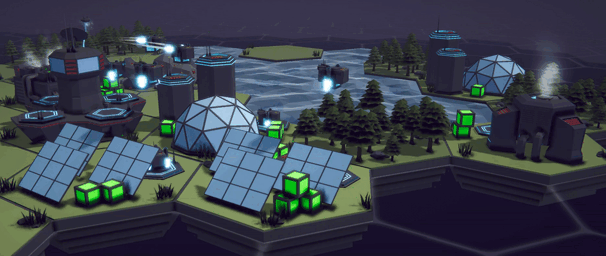
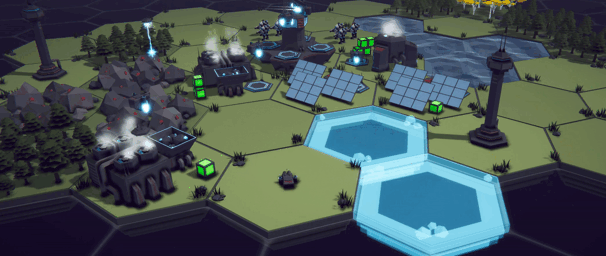
Gathering screenshots was fun! It meant I got to play the game - a lot. The biggest challenge was not getting distracted by fixed bugs!
Unity even has built-in screenshot functionality that’ll let you upscale the image to any multiple of the game view resolution. Need a 4k image but don’t have a 4k monitor? No problem. Want an 8k image for super high detail that can be cropped down? Easy.
I added an Odin button, a slider for scaling, and a keyboard hotkey to make the tool as user-friendly as I could. As a bonus feature, I take 2 images at a time. The first is through the main camera and the second is still through the main camera, but with my UI (camera) turned off. Having the two images to choose from is super handy! Sometimes an image looks good with the UI, other times not so much. The code is a bit of a mess, otherwise I’d share it.
Trailer
This is where things got a lot trickier. Trailers are short, but man are they a lot of work! I had visions of a slick tightly edited video that was 40-50 seconds. It would need to be designed to grab attention and drive interest. Not an easy thing to do.
This is what I’d attempted before and I was expecting to do it again.
Then a local developer shared an article with me: “The Simplest Trailer to Make for Your Steam Page.” The article doubled down on some of what I already knew and pushed hard on the idea of making a “gameplay” trailer - especially for those of us doing this as a hobby and in our spare time. A bang for the buck kind of thing, but it also gives potential customers what they want most - an idea of what the game feels like to play.
This was a huge relief and a massive boost in terms of productivity. It still took 15+ hours to gather the footage, cut it down, and edit it, but it wasn’t hard. It's not perfect, but it's something AND has made a measurable impact on Steam page traffic and wishlists. The video isn’t great for “social media.” It's not attention-grabbing, but embedded into a Steam page I think it works.
Is there still room for a cinematic or hype trailer? Probably. Will I make one? Maybe. Do I need one? Not sure.
Capsule Image
If you’ve heard anything from Chris Zukowski you’ve hopefully heard the importance of the capsule image. For most of us, the capsule image is our ENTIRE marketing strategy. We can make attempts at posting on Twitter, Reddit or YouTube, but converting those viewers into wishlists or sales is really, really hard. But! Once a user is already on Steam and sees an engaging capsule image it's a whole lot easier to get them to click that wishlist button. So with limited marketing skill, time and budget investing in a great capsule image makes a lot of sense.
I’ve had a placeholder capsule image on my page for months now. It’s nothing special. I always had the intention of replacing it with something more professional and eye-catching. I knew I was going to need to hire someone.
So, I went looking for an artist on Reddit, by posting in the GameDev Classified subreddit. It was less than productive… I don’t recommend it.
So I went to Fiverr and UpWork and found low prices but also fairly low-quality work. It was better than I could do, but not eye-catching and the images really didn’t make me want to click or learn more about the games.
I kept searching and looking. Where are all the artists?
I got on to Art Station and started to find a couple that looked better than what I’d found on other sites. There was one artist that I kept coming back to. Her work wasn’t necessarily the style I had envisioned, but it was good. The images told a story, they showed what the game was about, and they made me curious about what I’d see if I clicked. A few emails later and she’s started working on putting together sketches!
You can see Jess Thomas’s work for yourself -Website and Instagram. Her rates aren’t cheap. They really aren’t, but her work is really nice. I don’t know if it’ll pay off in the end, but if this is going to be how most players first learn about my game? Then I’ve got to try. (I’ll post her work once I get it.)
GIFs
An often ignored detail of a Steam page is adding GIFs. Most users will skip through a trailer potentially missing several scenes in the process. With GIFs embedded in the page you have the ability to pretty much ensure that a user will see a particular set of images! That’s kind of amazing.
Chris Zukowski recommends having trailers to show off the entire game loop. Which, like most of his advice, makes a ton of sense.
For making GIFs, my tools of choice are OBS to capture the footage and Davinci Resolve to edit and render the final GIFs. I made my GIFs 606 by 256. 606 pixels seems to be the best fit to the width of the Steam page! And 256? That seems to be the minimum rendering height for Davinci Resolve, which seems perfectly fine.
Come Take A Look
If you haven’t already, come take a look at the page. I’d love to hear your thoughts. What’s good? What could be better? Did I miss something?
Splitting Vertices - Hard Edges for Low Poly Procedural Generation
This isn’t a procedural generation post. There are plenty of videos and posts explaining how to generate procedural meshes. There’s no need for me to recreate that.
Rather this post should help in turning your procedurally generated mesh into a mesh with hard edges that is used in most “low poly” models. The post assumes is that you ALREADY have a procedural mesh who’s edges are smooth and you’d like a more traditional low poly or hard edge appearance. It also assumes that you understand the basics of vertices and triangles that make up a mesh.
What is a split edge?
Have you ever noticed that “low poly” assets often have a large number of vertices when imported to Unity? I had. I knew it was a thing, but never knew why.
The reason comes from the normals of the vertices, which are generally calculated from the normals of the triangles (which make up the faces) that use a given vertex. If multiple triangles use a vertext then the normal of the vertex is the average of the all the triangle normals. Which can cause a smoothing of the edges.

Vertex normals (blue lines) with smooth shading

Vertex Normals (Purple Lines) with Hard Edges
To fix this we need each vertex to only be used by a single triangle. This way the vertex normal is the same as the individual triangle normal. But how does that work? Surely the vertex on the corner of a cube must be used by three sides!
The trick is to duplicate the vertex for each triangle. In a normal cube, this means we go from 8 vertices to 24. Each side of the cube has 2 triangles, so 12 total triangles and each triangle needs 3 vertices. Which is why when we import models from Blender into Unity that are flat shaded the number of vertices increases substantially - it may not always be 3 times as it depends on the geometry but it’s often close to tripling. When we import into Unity, it can do the vertex splitting automatically, but when generating models procedurally we need to do it ourselves.
The images above are from Blender where you can toggle what normals are shown. So it’s a bit fudged, but it demostrates the idea. Both cubes are also shown with hard edges since this is the default in Blender. Smooth rendering in Blender looks a bit different than in Unity so I just left them both with hard edges :)
How do we do it?
I struggled with this part as I wanted to split the vertices as I created the mesh, but I quickly realized the easiest way would be to split the vertices after the mesh is created - which also makes it a pretty universal method. With that approach its relativiely simple.
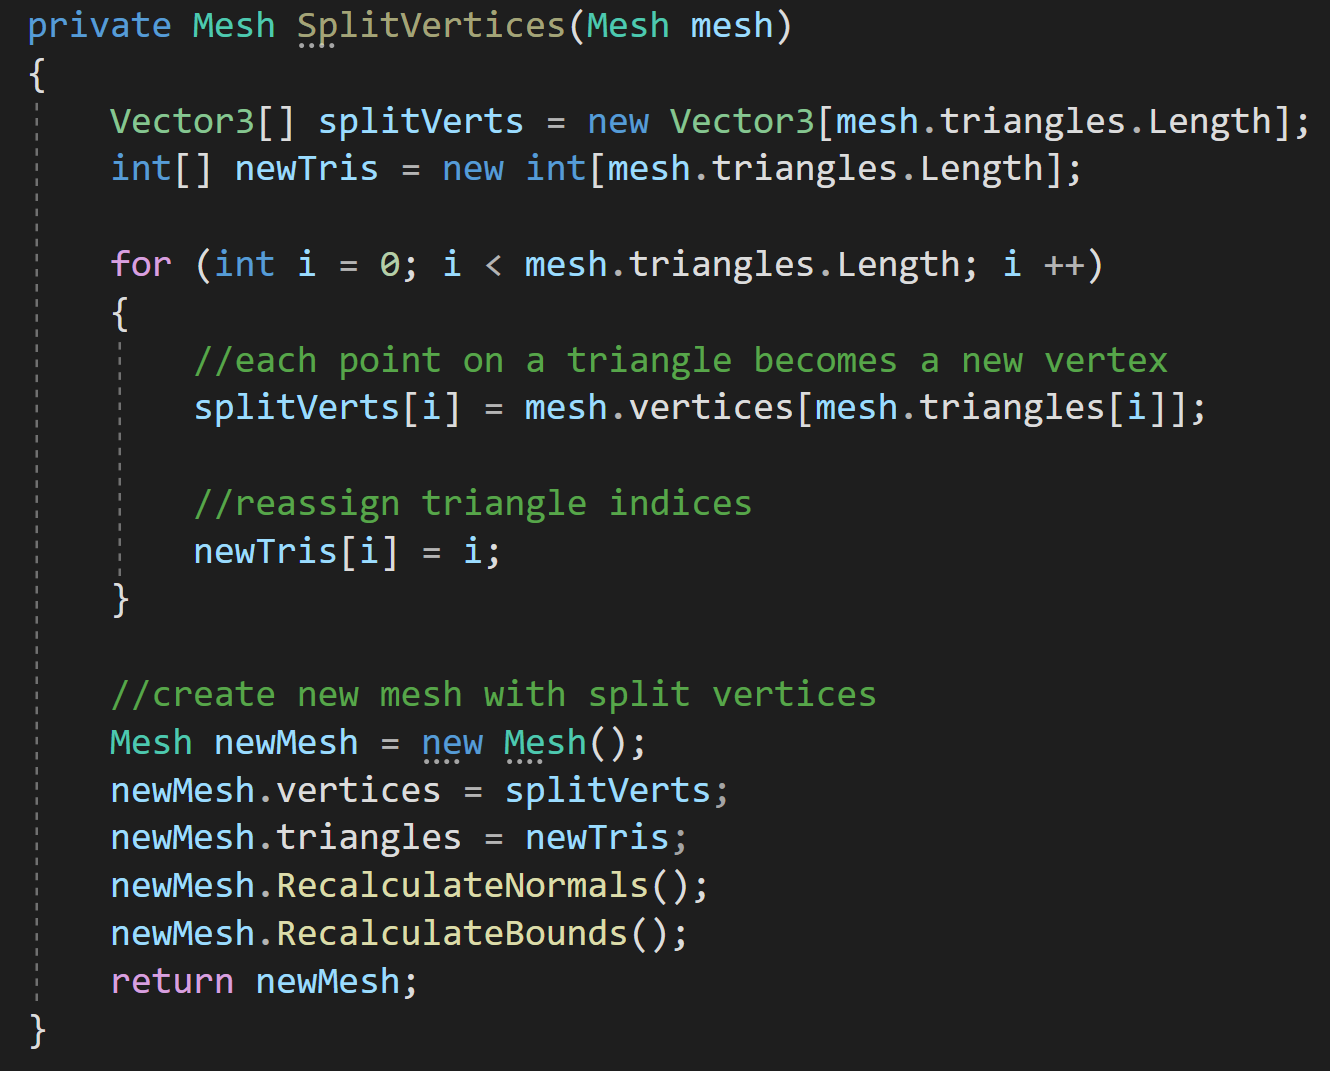
Big picture: To split the vertices we need to duplicate the vertices and then reassign triangles indices so the triangles refer to the new and correct vertices.
To get started, we create a new array for the split vertices that is the length of mesh’s triangle array - each point on a triangle needs a unique vertex. For simplicity and clarity, I also create a new triangle array for use by are new mesh.
From there we iterate through our number of triangles storing vertices for each point on a triangle and reassigning indices in the triangle array.
The last step is to build a new mesh with the new vertices and new triangles. You could reuse the incoming mesh, but creating a new one felt clearer. Reusing the incoming mesh could also let you avoid creating a new array for the triangles.
That’s it. Pretty simple but something that I hadn’t found documented in other places. Hopefully its useful to someone.
Older Posts
-
January 2026
- Jan 27, 2026 Save and Load Framework Jan 27, 2026
-
April 2024
- Apr 10, 2024 Ready for Steam Next Fest? - Polishing a Steam Page Apr 10, 2024
- Apr 1, 2024 Splitting Vertices - Hard Edges for Low Poly Procedural Generation Apr 1, 2024
-
November 2023
- Nov 18, 2023 Minute 5 to Minute 10 - Completing the Game Loop Nov 18, 2023
-
September 2023
- Sep 13, 2023 Visual Debugging with Gizmos Sep 13, 2023
-
July 2023
- Jul 4, 2023 Easy Mode - Unity's New Input System Jul 4, 2023
-
May 2023
- May 19, 2023 Level Builder - From Pixels to Playable Level May 19, 2023
-
April 2023
- Apr 11, 2023 Input Action in the Inspector - New Input System Apr 11, 2023
-
February 2023
- Feb 26, 2023 Tutorial Hell - Why You're There. How to Get Out. Feb 26, 2023
-
December 2022
- Dec 31, 2022 Upgrade System (Stats Part 2) Dec 31, 2022
-
November 2022
- Nov 10, 2022 Stats in Unity - The Way I Do it Nov 10, 2022
- Nov 5, 2022 State of UI in Unity - UI Toolkit Nov 5, 2022
-
August 2022
- Aug 17, 2022 Knowing When A Coroutine Finishes Aug 17, 2022
-
April 2022
- Apr 23, 2022 Unity Input Event Handlers - Or Adding Juice the Easy Way Apr 23, 2022
-
March 2022
- Mar 15, 2022 *Quitting a Job I Love Mar 15, 2022
-
February 2022
- Feb 8, 2022 Split Screen: New Input System & Cinemachine Feb 8, 2022
-
January 2022
- Jan 24, 2022 (Better) Object Pooling Jan 24, 2022
- Jan 19, 2022 Designing a New Game - My Process Jan 19, 2022
- Jan 16, 2022 Strategy Game Camera: Unity's New Input System Jan 16, 2022
-
December 2021
- Dec 16, 2021 Raycasting - It's mighty useful Dec 16, 2021
-
November 2021
- Nov 22, 2021 Cinemachine. If you’re not. You should. Nov 22, 2021
-
August 2021
- Aug 3, 2021 C# Extension Methods Aug 3, 2021
-
June 2021
- Jun 27, 2021 Changing Action Maps with Unity's "New" Input System Jun 27, 2021
-
May 2021
- May 28, 2021 Unity's New Input System May 28, 2021
- May 8, 2021 Bolt vs. C# - Thoughts with a dash of rant May 8, 2021
-
March 2021
- Mar 10, 2021 Coroutines - Unity & C# Mar 10, 2021
-
January 2021
- Jan 14, 2021 Where's My Lunch? - January Devlog Update Jan 14, 2021
-
December 2020
- Dec 27, 2020 C# Generics and Unity Dec 27, 2020
- Dec 7, 2020 Steam Workshop with Unity and Facepunch Steamworks Dec 7, 2020
-
November 2020
- Nov 27, 2020 Simple Level Save and Load System (Unity Editor) Nov 27, 2020
- Nov 9, 2020 Command Pattern - Encapsulation, Undo and Redo Nov 9, 2020
-
October 2020
- Oct 28, 2020 GJTS - Adding Steamworks API and Uploading Oct 28, 2020
- Oct 9, 2020 Game Jam... Now What? Oct 9, 2020
-
August 2020
- Aug 16, 2020 Strategy Pattern - Composition over Inheritance Aug 16, 2020
-
July 2020
- Jul 24, 2020 Observer Pattern - C# Events Jul 24, 2020
- Jul 15, 2020 Object Pooling Jul 15, 2020
- Jul 3, 2020 Cheat Codes with Unity and C# Jul 3, 2020
-
June 2020
- Jun 16, 2020 The State Pattern Jun 16, 2020
-
August 2019
- Aug 12, 2019 Easy UI Styles for Unity Aug 12, 2019
-
July 2019
- Jul 3, 2019 9th Grade Math to the Rescue Jul 3, 2019
-
June 2019
- Jun 12, 2019 Introducing My Next Game (Video DevLog) Jun 12, 2019
-
May 2019
- May 29, 2019 Programming Challenges May 29, 2019
-
March 2019
- Mar 2, 2019 Something New - Asking "What Can I Learn?" Mar 2, 2019
-
November 2018
- Nov 30, 2018 A Growing Channel and a New Tutorial Series Nov 30, 2018
-
October 2018
- Oct 11, 2018 Procedural Spaceship Generator Oct 11, 2018
-
July 2018
- Jul 11, 2018 Implementing SFX in Unity Jul 11, 2018
-
May 2018
- May 31, 2018 Prototyping Something New May 31, 2018
-
April 2018
- Apr 17, 2018 When to Shelve a Game Project? Apr 17, 2018
-
February 2018
- Feb 9, 2018 State of the Game - Episode 3 Feb 9, 2018
-
December 2017
- Dec 16, 2017 State of the Game - Episode 2 Dec 16, 2017
-
November 2017
- Nov 7, 2017 The Bump From A "Viral" Post Nov 7, 2017
-
October 2017
- Oct 30, 2017 NPC Job System Oct 30, 2017
-
September 2017
- Sep 1, 2017 Resources and Resource Systems Sep 1, 2017
-
August 2017
- Aug 3, 2017 State of the Game - Episode 1 Aug 3, 2017
-
June 2017
- Jun 20, 2017 Resources: Processing, Consumption and Inventory Jun 20, 2017
- Jun 15, 2017 Energy is Everything Jun 15, 2017
-
May 2017
- May 16, 2017 Graphing Script - It's not exciting, but it needed to be made May 16, 2017
- May 2, 2017 Tutorials: Low Poly Snow Shader May 2, 2017
-
April 2017
- Apr 28, 2017 Low Poly Snow Shader Apr 28, 2017
- Apr 21, 2017 Environmental Simulation Part 2 Apr 21, 2017
- Apr 11, 2017 Environmental Simulation Part 1 Apr 11, 2017
-
March 2017
- Mar 24, 2017 Building a Farming Game Loop and Troubles with Ground Water Mar 24, 2017
-
February 2017
- Feb 25, 2017 The Inevitable : FTF PostMortem Feb 25, 2017
-
December 2016
- Dec 7, 2016 Leaving Early Access Dec 7, 2016
-
November 2016
- Nov 28, 2016 Low Poly Renders Nov 28, 2016
- Nov 1, 2016 FTF: Testing New Features Nov 1, 2016
-
October 2016
- Oct 27, 2016 Watchtowers - Predictive Targeting Oct 27, 2016
- Oct 21, 2016 Click to Color Oct 21, 2016
- Oct 19, 2016 Unity Object Swapper Oct 19, 2016
-
September 2016
- Sep 18, 2016 Testing Single Player Combat Sep 18, 2016
-
May 2016
- May 25, 2016 Release Date and First Video Review May 25, 2016
-
March 2016
- Mar 26, 2016 Getting Greenlit on Steam Mar 26, 2016